lesson 3 : Simple Layout
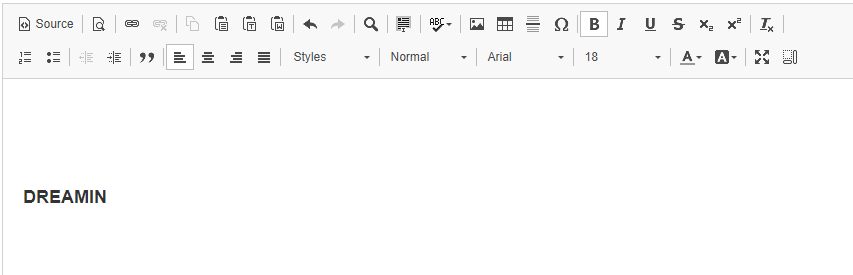
ドリーミン (Dreamin') Tutorial

now playing NCT127 - Limitless


LESSON 3: SIMPLE LAYOUT
In this chapter I will teach you on how to make a very very very simple layout (sings to I.O.I - Very Very Very). Lol sorry I'm crazy and weird tbh. Haha ok back to the simple layout I mentioned. This is very simple because I just make your layout 5%-10% better than you only have a plain text. 99.99% of you guys already know this. And this chapter will be soooooooo long. I'll teach on how to change your text colour, add gif/ images and add hyperlink to your text/ photo. Some photos i used here are the old one. I only make new screenshots for any additional, hope you guys won't mind it.
1. Change you text's colour.
Told ya! It is just a very very very simple lesson today. But there is something new that you guys might learn.
1. Type any word or text.
2. highlight or select the text (if you type a long text, select the text that you want to change the colour only). then click on the A, the text colour. I highlight it with peach colour in the photo below.

3. You will be able to choose the colour that you want. When you choose your colour, your text will change colour. But, you can choose more colour by clicking on More Colors...

4. When you click on More Colors. A new window will pop-up and there are variety colour you can choose. Choose your colour and click on OK.

5.Yayy finally your text had changed colour. It's simple right.

EXTRA!!
This is another way for you to get more colour. There are sooooo many colour available. The one you can found in Aff editor (picture at step 4) only few of it. In this step I'll teach you on how to get more colour for your layout (useful when you make your own layout that has text boxes). As example colours that I choose to make layout for this thread. As you see the background is blue but not the blue that you can found in Aff editor (picture at step 4). I get the colour from other website.
6. So back to step 4, the window that pop-out when you click on More Colors. As you can see there is a big square under the Highlight. That is PREVIEW. You can view the colour that you selected from there.

7. This is the best part. Now as you see there is also two rectangles below Selected Color. One has the color as the highlight, another one has #ff0066 which is known as HEX CODE. As I point in the photo below (arrow) that is preview. But the preview shown is according to the Hex Code in the box/ rectangle below it.

8. Below I point you the Hex Code. Now we will do something with that. I'll show you to get colour that you can find from the colours in aff editor (as you see below).

9. Now open Colourlovers in new tab. This website you can find many colours and colour palettes that are useful to make layout.

10. Now I'll show you how to get layout. From step 9, you can click on PALETTES (the one below LATEST BLOG POSTS). click on the word PALETTES. This one is another way. Both are same tbh, it is just this time you hover at the word browse and click on the word PALETTES.

11. You will see this. Now click on search.

12. You will see this. As you see, the palettes are arranged according to the number of loves (in decesding order). You can search for palettes that you want by put keyword, hex, lover or hues. keyword and hex is pretty hard since you must know what are you looking for. Hues is meant by colour. That's mean the colour you want your palette to have.

13. I choose the Hues to purple (i only put one colour, maximum can be put is three. After I choose purple I click on search and the results i got are as below.

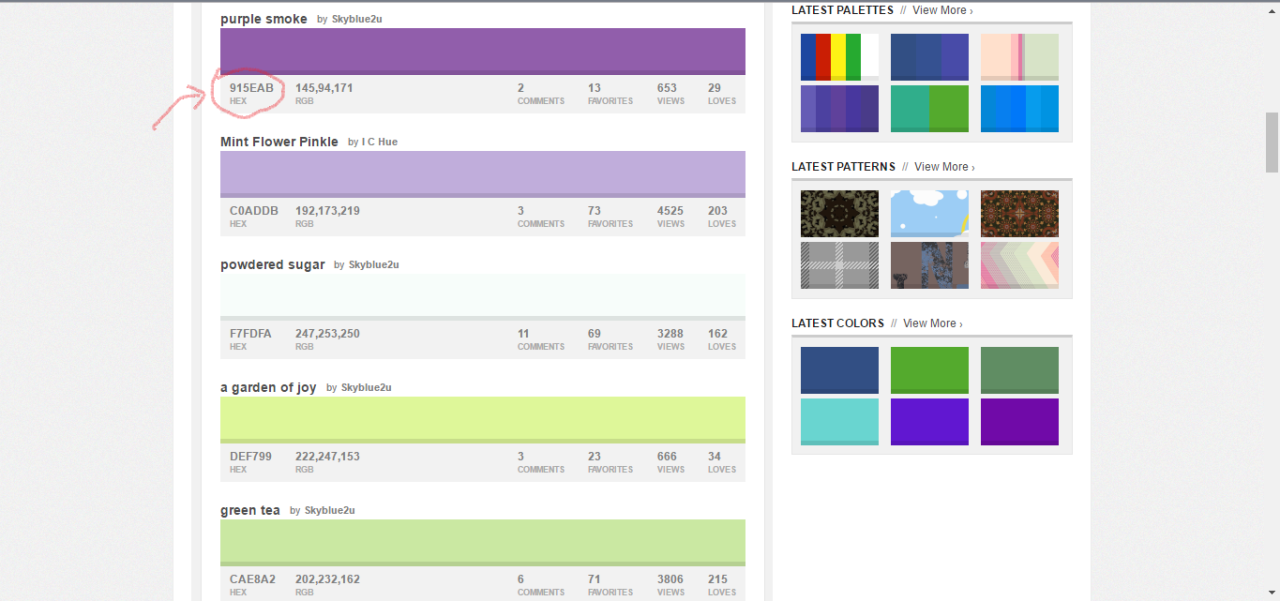
14. I scrolled the results until I found a palette named Mint Flower Tea. I clicked on it.

15. As you see in photo in step 14, there are 5 colours in this palette. When you scrolled down, you will find information about the palette and colours in the palette. In the photo below I circled the text/ code. That's Hex Code. So now copy the the code.
16. Now back to aff. Now I want you to replace #ff0066 with the code that we copied from colourlovers. Make sure you have the '#' before the codes, or else it won't works. Click on the preview, the rectangle below selected color. You will get the colour that you have chosen just now. This colour you can't find among the color that provide in the editor/ window (i still donno what to call it). Then you click on OK.

17. And Tadaa!!! Your text has changed to the colour that you have chosen from colourlovers!!.

2. Add Gif/ Images
(start from this one i decided to use new screenshots)
1. So first step is click on image.
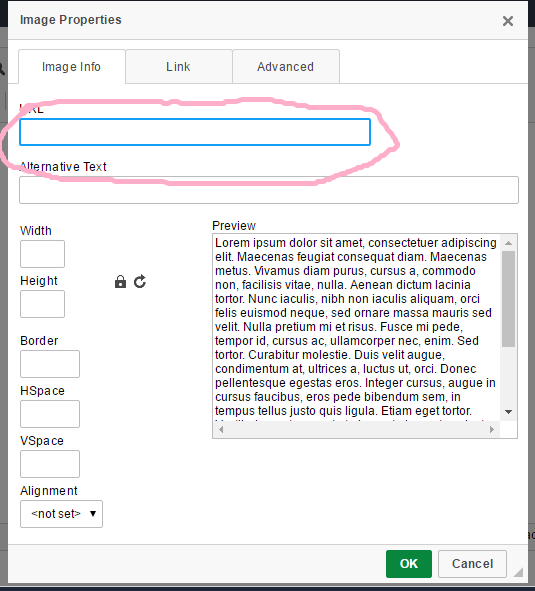
2. A new window will pop-up. To add a gif/ photo you have to put url link.
3. Now open a new tab. Search for photo that you want to put in. I search for Yuta. (lemme scream for 1 minute... Yuta!!!!!~~~ Lol, I know i'm weird. He's my bias list ruiner tbh XD.. *slapped myself* ok let's back to the our lesson) Now choose the photo that you want (I took 5 minutes to choose Yuta's photo, I want to choose all of his photos). Right click on the photo you chosen. You have two choices, either to Open In A New Tab or Copy Image Address. I recommend to choose Copy Image Address, because you guys will skip the next step.

4. Just additional. If you guys choose Open Image In A New Tab. After the image opened in the new tab, copy the link (I circle below)

5. Go back to Asianfanfics and paste the link in URL. If you guys choose Copy Image Address in step 3, you guys can skip step 4 and directly to step 5. After paste the link, you guys can adjust the height and width to your liking.

6. Click on OK and tadaa!! Here's Nakamoto Yuta. (lemme scream again. YUTA!!!!!~~)

This is additional. You can choose your photos or gifs at any site besides Google Images. If you ask me where do I search for photos, it's Tumblr. All of my photos or gifs I used are taken from Tumblr. It is because photos and gifs that are in Tumblr are high quality. You guys can use We Heart It too. If my own graphics, photos or gifs I usually upload them on Photobucket before, but now I change to Tumblr. I love Tumblr haha xD. So I'll show how to get photos from Tumblr. To be honest just the same steps I used.
7. Open Tumblr, search for the photo you want. Of course I search for Yuta's. Find the photo, right click. I'll skip Open In A New Tab steps. So we just directly copy the url by clicking on Copy Image Address.

8. Back to Asianfanfics. Paste the link in URL.

9. Click OK and Tadaaaa!!!

ADDITIONAL NOTES!!!
Asianfanfics has updated and upgrade the website. Now we can upload photos in Asianfanfics. You guys can also used the photos that you guys uploaded to be added in your layout/ story. Similar with all the steps. Just copy the url link. It's simple!
This one is such a long lesson. to be honest I have another lesson (hyperlink). But I think I'll do it in next chapter. And sorry for not updating for few days. I was busy with my gallery, I change the layout there. Still not done. In next chapter I'm not sure to post about graphic or layout. Someone asked me about adding music from Soundcloud. If you guys want the lesson on adding music to your layout same as in my layout, that will be difficult, because you have to work with text boxes, margins, border-radius and more. It will take times for me to do the lesson. Maybe I just do tutorial for the easiest way to add song from Soundcloud. The one you don't need to deal with text boxes, margins and etc.
In this chapter I will teach you on how to make a very very very simple layout (sings to I.O.I - Very Very Very). Lol sorry I'm crazy and weird tbh. Haha ok back to the simple layout I mentioned. This is very simple because I just make your layout 5%-10% better than you only have a plain text. 99.99% of you guys already know this. And this chapter will be soooooooo long. I'll teach on how to change your text colour, add gif/ images and add hyperlink to your text/ photo. Some photos i used here are the old one. I only make new screenshots for any additional, hope you guys won't mind it.
1. Change you text's colour.
Told ya! It is just a very very very simple lesson today. But there is something new that you guys might learn.
1. Type any word or text.
2. highlight or select the text (if you type a long text, select the text that you want to change the colour only). then click on the A, the text colour. I highlight it with peach colour in the photo below.
3. You will be able to choose the colour that you want. When you choose your colour, your text will change colour. But, you can choose more colour by clicking on More Colors...
4. When you click on More Colors. A new window will pop-up and there are variety colour you can choose. Choose your colour and click on OK.
5.Yayy finally your text had changed colour. It's simple right.
EXTRA!!
This is another way for you to get more colour. There are sooooo many colour available. The one you can found in Aff editor (picture at step 4) only few of it. In this step I'll teach you on how to get more colour for your layout (useful when you make your own layout that has text boxes). As example colours that I choose to make layout for this thread. As you see the background is blue but not the blue that you can found in Aff editor (picture at step 4). I get the colour from other website.
6. So back to step 4, the window that pop-out when you click on More Colors. As you can see there is a big square under the Highlight. That is PREVIEW. You can view the colour that you selected from there.
7. This is the best part. Now as you see there is also two rectangles below Selected Color. One has the color as the highlight, another one has #ff0066 which is known as HEX CODE. As I point in the photo below (arrow) that is preview. But the preview shown is according to the Hex Code in the box/ rectangle below it.
8. Below I point you the Hex Code. Now we will do something with that. I'll show you to get colour that you can find from the colours in aff editor (as you see below).
9. Now open Colourlovers in new tab. This website you can find many colours and colour palettes that are useful to make layout.
10. Now I'll show you how to get layout. From step 9, you can click on PALETTES (the one below LATEST BLOG POSTS). click on the word PALETTES. This one is another way. Both are same tbh, it is just this time you hover at the word browse and click on the word PALETTES.
11. You will see this. Now click on search.
12. You will see this. As you see, the palettes are arranged according to the number of loves (in decesding order). You can search for palettes that you want by put keyword, hex, lover or hues. keyword and hex is pretty hard since you must know what are you looking for. Hues is meant by colour. That's mean the colour you want your palette to have.
13. I choose the Hues to purple (i only put one colour, maximum can be put is three. After I choose purple I click on search and the results i got are as below.
14. I scrolled the results until I found a palette named Mint Flower Tea. I clicked on it.
15. As you see in photo in step 14, there are 5 colours in this palette. When you scrolled down, you will find information about the palette and colours in the palette. In the photo below I circled the text/ code. That's Hex Code. So now copy the the code.
16. Now back to aff. Now I want you to replace #ff0066 with the code that we copied from colourlovers. Make sure you have the '#' before the codes, or else it won't works. Click on the preview, the rectangle below selected color. You will get the colour that you have chosen just now. This colour you can't find among the color that provide in the editor/ window (i still donno what to call it). Then you click on OK.
17. And Tadaa!!! Your text has changed to the colour that you have chosen from colourlovers!!.
2. Add Gif/ Images
(start from this one i decided to use new screenshots)
1. So first step is click on image.
2. A new window will pop-up. To add a gif/ photo you have to put url link.
3. Now open a new tab. Search for photo that you want to put in. I search for Yuta. (lemme scream for 1 minute... Yuta!!!!!~~~ Lol, I know i'm weird. He's my bias list ruiner tbh XD.. *slapped myself* ok let's back to the our lesson) Now choose the photo that you want (I took 5 minutes to choose Yuta's photo, I want to choose all of his photos). Right click on the photo you chosen. You have two choices, either to Open In A New Tab or Copy Image Address. I recommend to choose Copy Image Address, because you guys will skip the next step.
4. Just additional. If you guys choose Open Image In A New Tab. After the image opened in the new tab, copy the link (I circle below)
5. Go back to Asianfanfics and paste the link in URL. If you guys choose Copy Image Address in step 3, you guys can skip step 4 and directly to step 5. After paste the link, you guys can adjust the height and width to your liking.
6. Click on OK and tadaa!! Here's Nakamoto Yuta. (lemme scream again. YUTA!!!!!~~)
This is additional. You can choose your photos or gifs at any site besides Google Images. If you ask me where do I search for photos, it's Tumblr. All of my photos or gifs I used are taken from Tumblr. It is because photos and gifs that are in Tumblr are high quality. You guys can use We Heart It too. If my own graphics, photos or gifs I usually upload them on Photobucket before, but now I change to Tumblr. I love Tumblr haha xD. So I'll show how to get photos from Tumblr. To be honest just the same steps I used.
7. Open Tumblr, search for the photo you want. Of course I search for Yuta's. Find the photo, right click. I'll skip Open In A New Tab steps. So we just directly copy the url by clicking on Copy Image Address.
8. Back to Asianfanfics. Paste the link in URL.
9. Click OK and Tadaaaa!!!
ADDITIONAL NOTES!!!
Asianfanfics has updated and upgrade the website. Now we can upload photos in Asianfanfics. You guys can also used the photos that you guys uploaded to be added in your layout/ story. Similar with all the steps. Just copy the url link. It's simple!
This one is such a long lesson. to be honest I have another lesson (hyperlink). But I think I'll do it in next chapter. And sorry for not updating for few days. I was busy with my gallery, I change the layout there. Still not done. In next chapter I'm not sure to post about graphic or layout. Someone asked me about adding music from Soundcloud. If you guys want the lesson on adding music to your layout same as in my layout, that will be difficult, because you have to work with text boxes, margins, border-radius and more. It will take times for me to do the lesson. Maybe I just do tutorial for the easiest way to add song from Soundcloud. The one you don't need to deal with text boxes, margins and etc.
Layout by minocha99 | 2017

To all subbies~~ Finally i'm back! My semester break has start since last two weeks but i was busy and just got my free time. I'm not sure how many updates i can make. But I try my best to update as many as i can. I haven't finish my render too. I just try to finish it as soon as i can.
Comments