tutorial 2: Downloading And Installing
ドリーミン (Dreamin') Tutorial

now playing NCT127 - Limitless


TUTORIAL 2: DOWNLOADING AND INSTALLING
Yeah finally I'm back with graphic tutorial. In this tutorial I will teach you on how to installing fonts, brushes to your GIMP. These two are very useful in making a graphic especially fonts. After this you can add fonts and brushes by yourself.
1. FONTS.
1. Firstly you have to download. For fonts I recommend you to download from 1001 Fonts and Dafont. You can download from other websites too. So I choose Dafont.
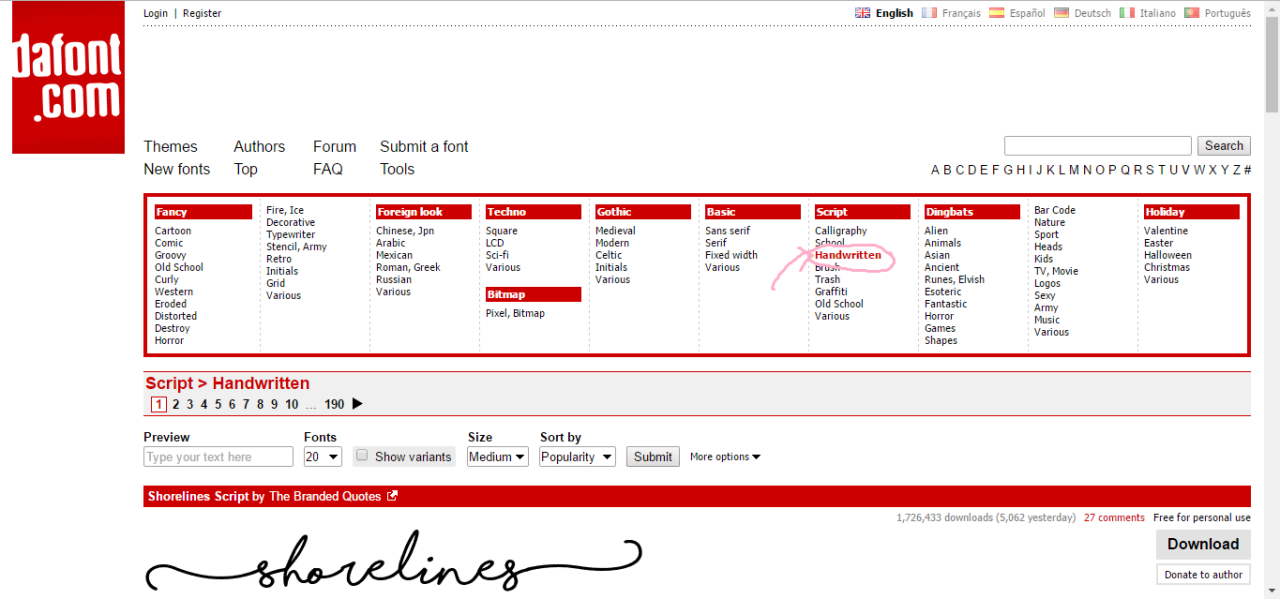
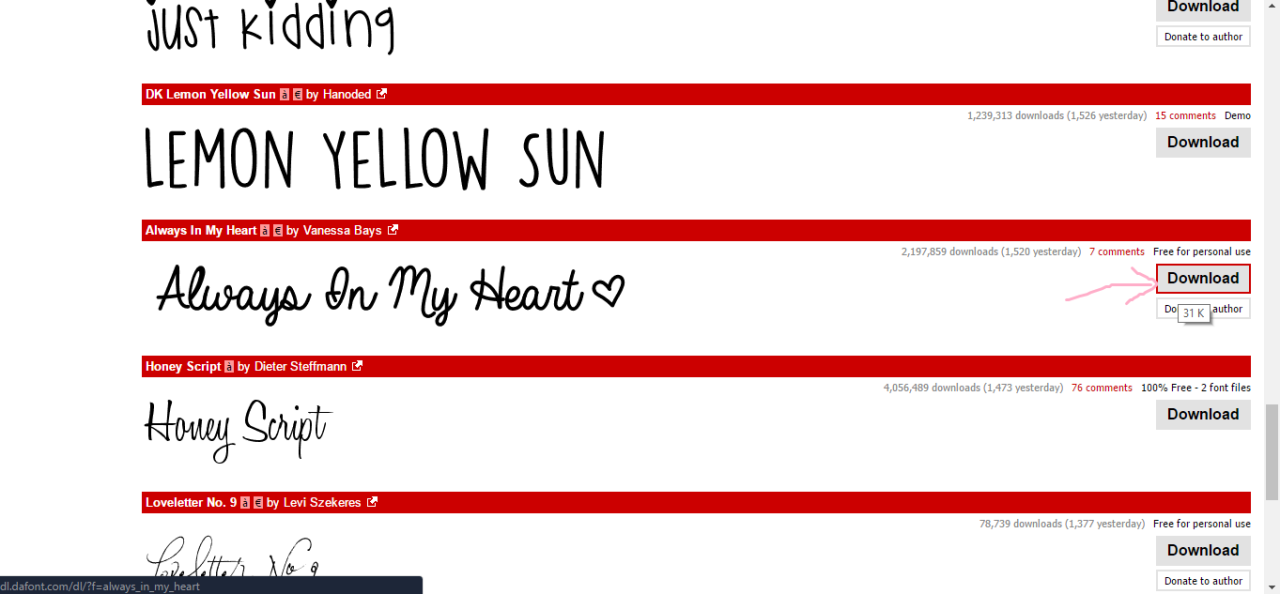
2. Scroll until you found Always In My Heart, if you can't find it, click here. Then click on Download. Save your font in any folder that easy for you to find after this.
3. Now open the folder that have the downloaded font. Double click on it or open it in WinRAR or ZIP software, we're going to extract it from zip file.

4. Click on the one saved in ttf (true type font) file format. Then click on extract.
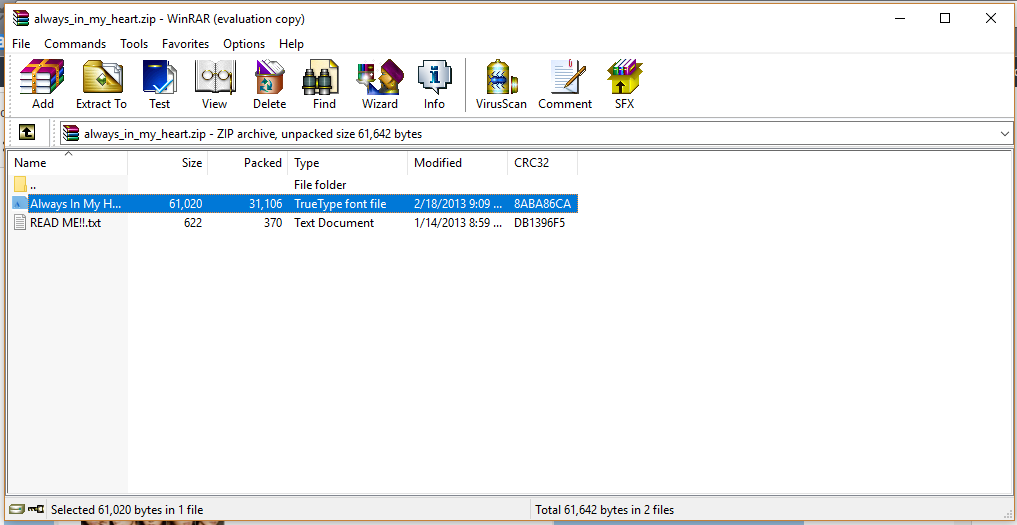
5. Save the text file in the same folder as the original Zip file.

6. Now open Control Panel. Click on Fonts.
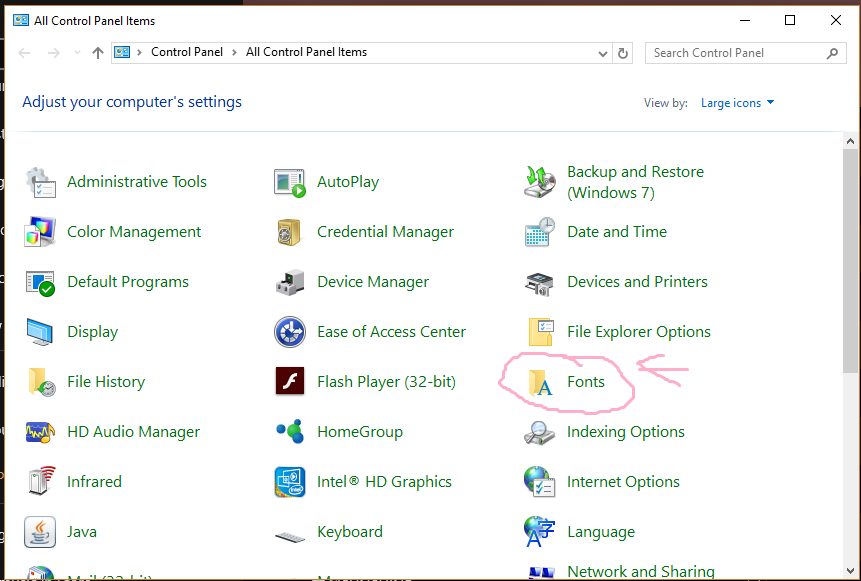
7. Drag the file that we extracted just now from folder to Fonts in Control Panel. You can copy and then paste at fonts.
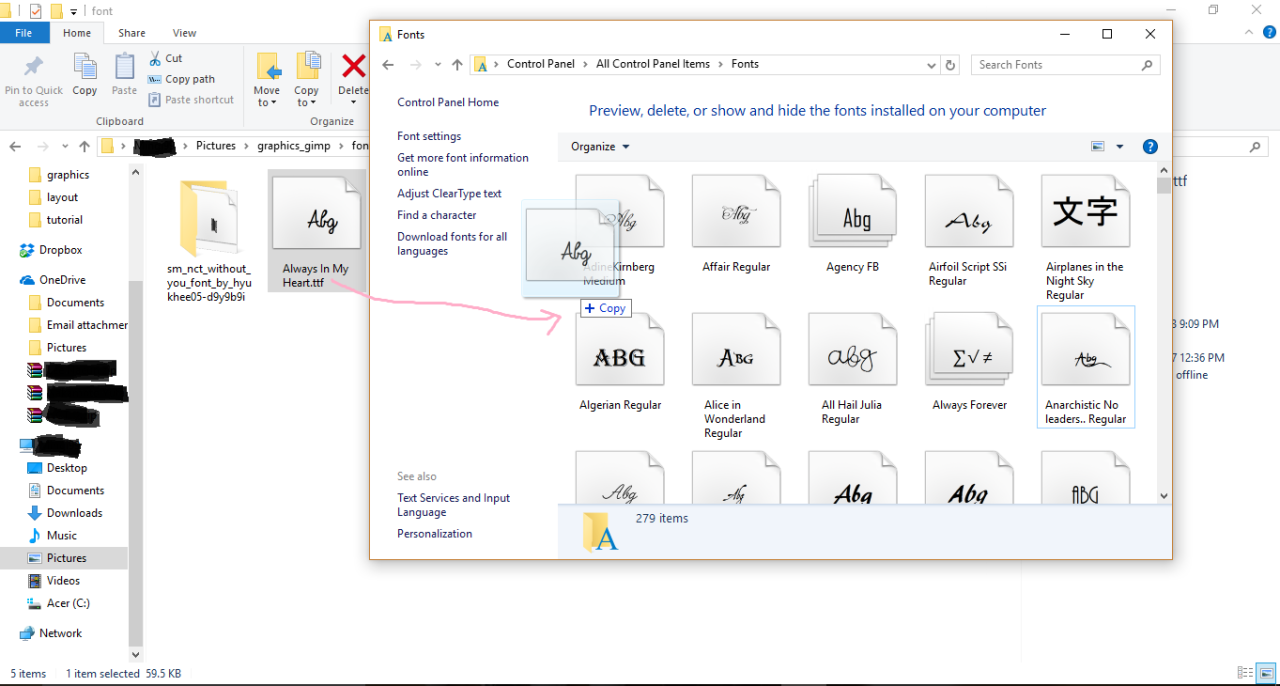
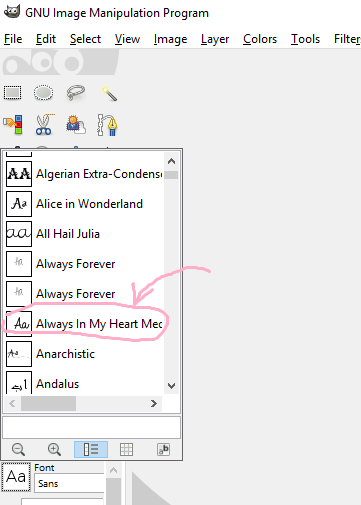
8. Your new font file is there. Now when you open your GIMP, you can find your new font.

2. BRUSHES
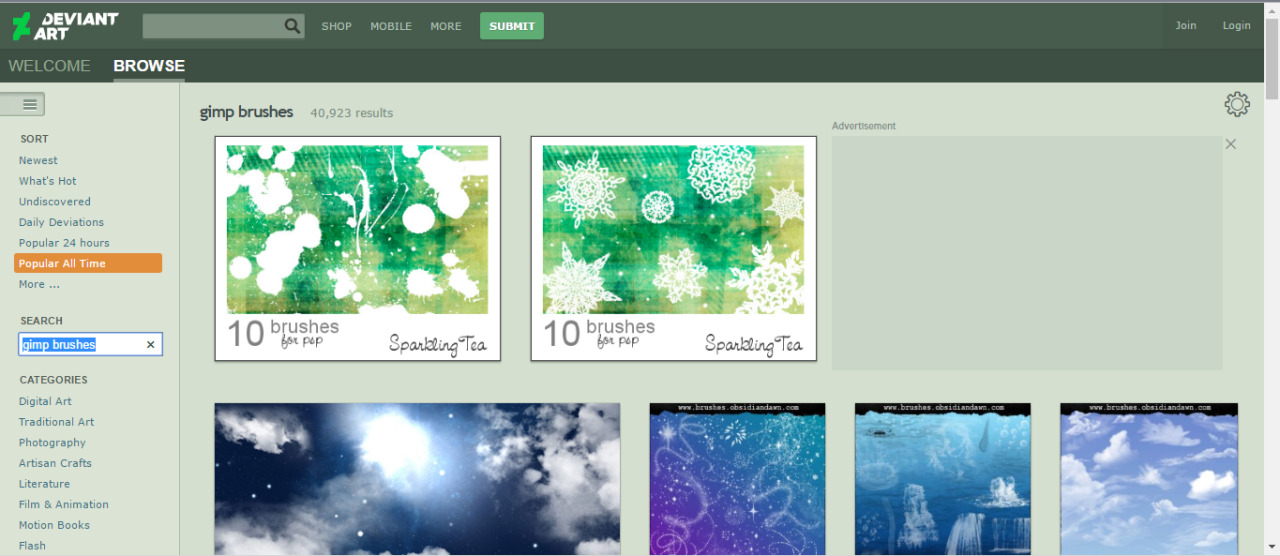
1. For brushes, there are lot of websites that you can find for brushes. You can search for GIMP brush or Photoshop brush. Photoshop brushes can be used in GIMP. I usually search for brushes in DeviantArt. Now open the site, DeviantArt. After you open it type GIMP brushes or GIMP brush then click on Search. You will get this.
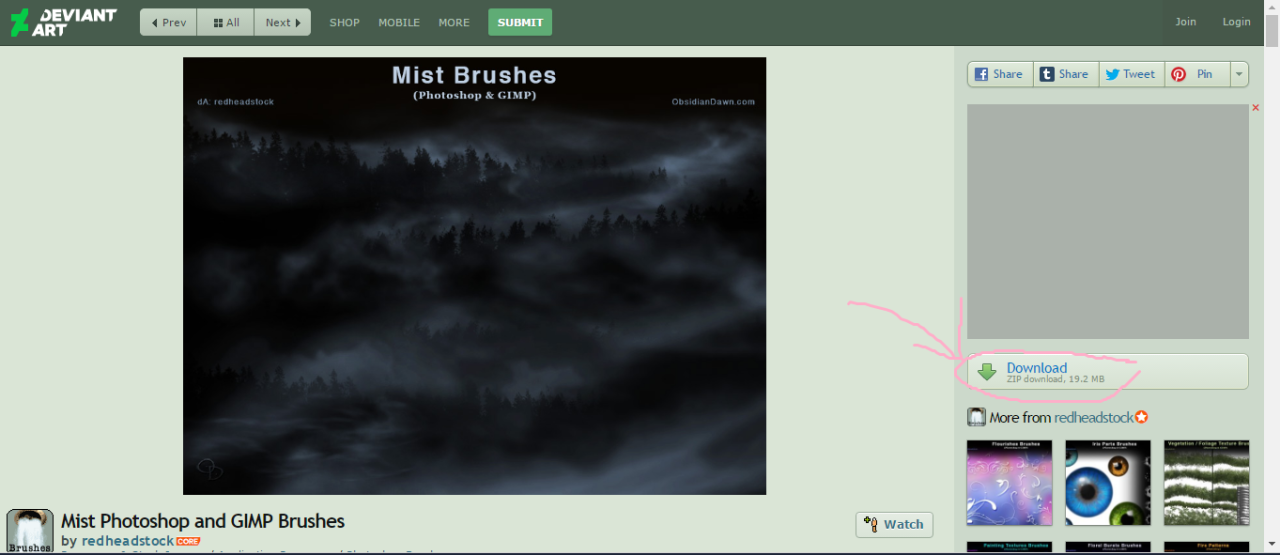
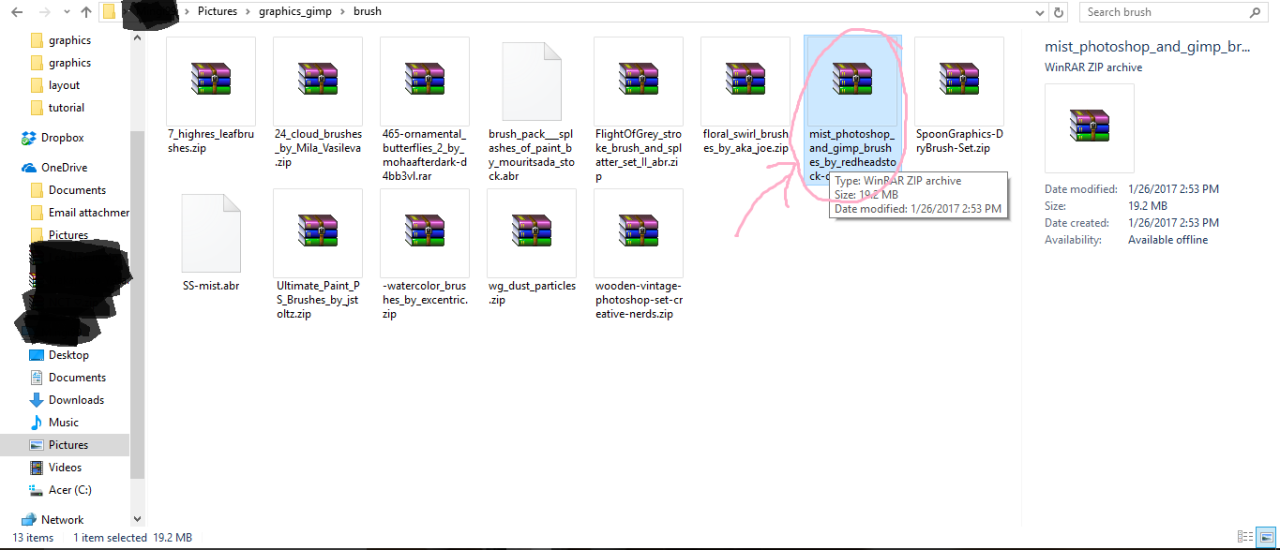
2. Scroll down until you found Mist Photoshop and GIMP Brushes, if you can't find it click here. Download the file, save it to any folder that easy for you to find it later.
3. After the file downloaded, open the folder that have the file. Open the file in WinRAR or ZIP software. Yes, we're going to actract the file too, unless the file is already in .abr file format.
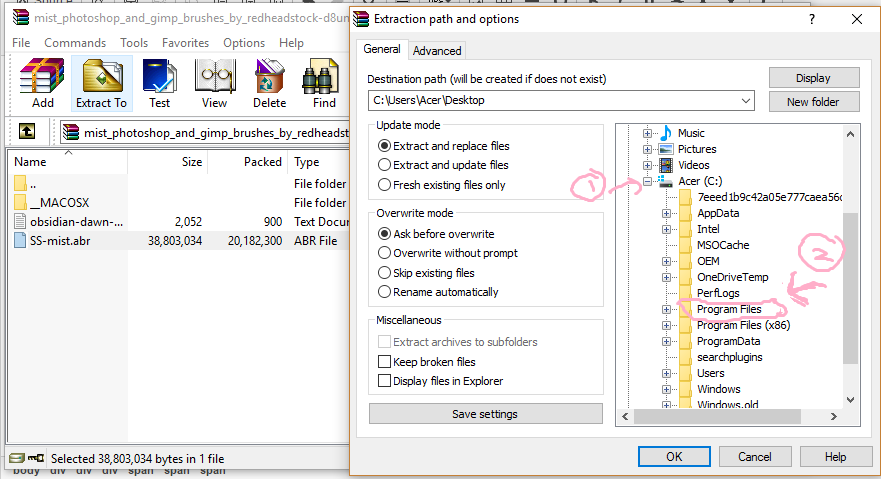
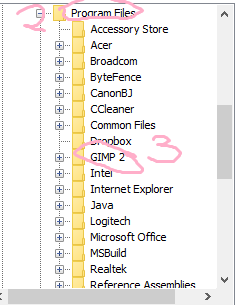
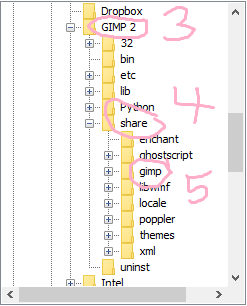
4. Now we're going to extract the file, but not in the same folder as the original zip file. We have to extract it in our gimp software folder. Please follow one by one because it might be confusing.
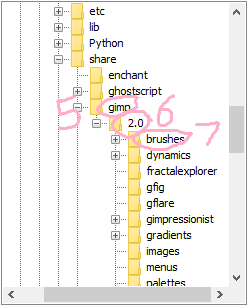
Folder order... Your hard disk (C:) ► Program Files ► GIMP 2 ► share ► gimp ► 2.0 ► brushes
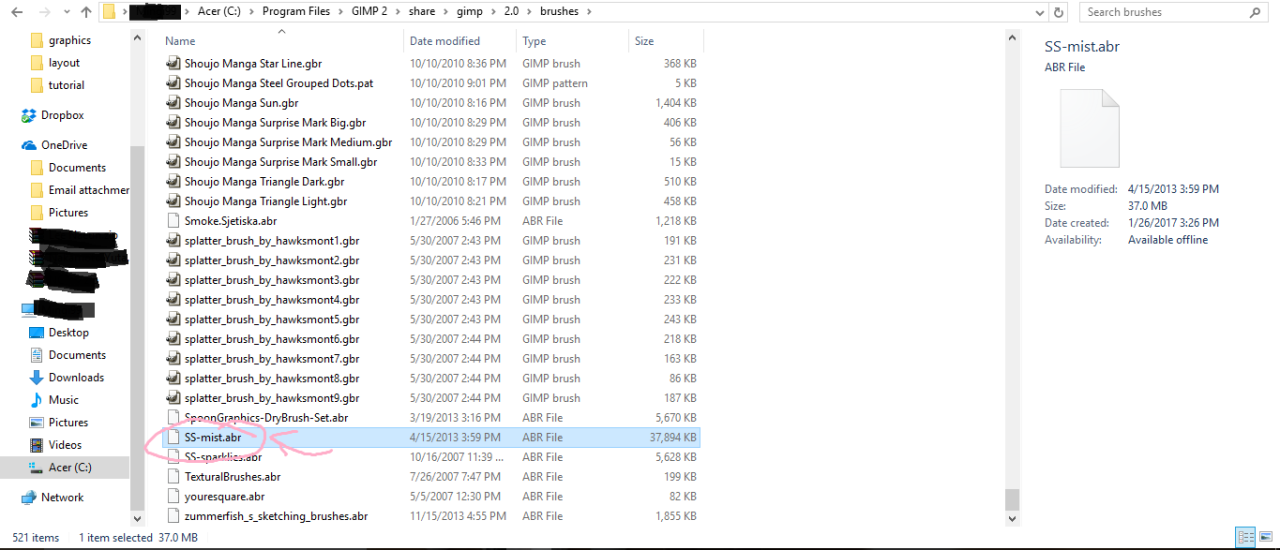
5. Here is your file. You can view it after done extracted it. You also can extract file in the same folder as the original zip file and then copy/move it to the gimp software's brush folder.
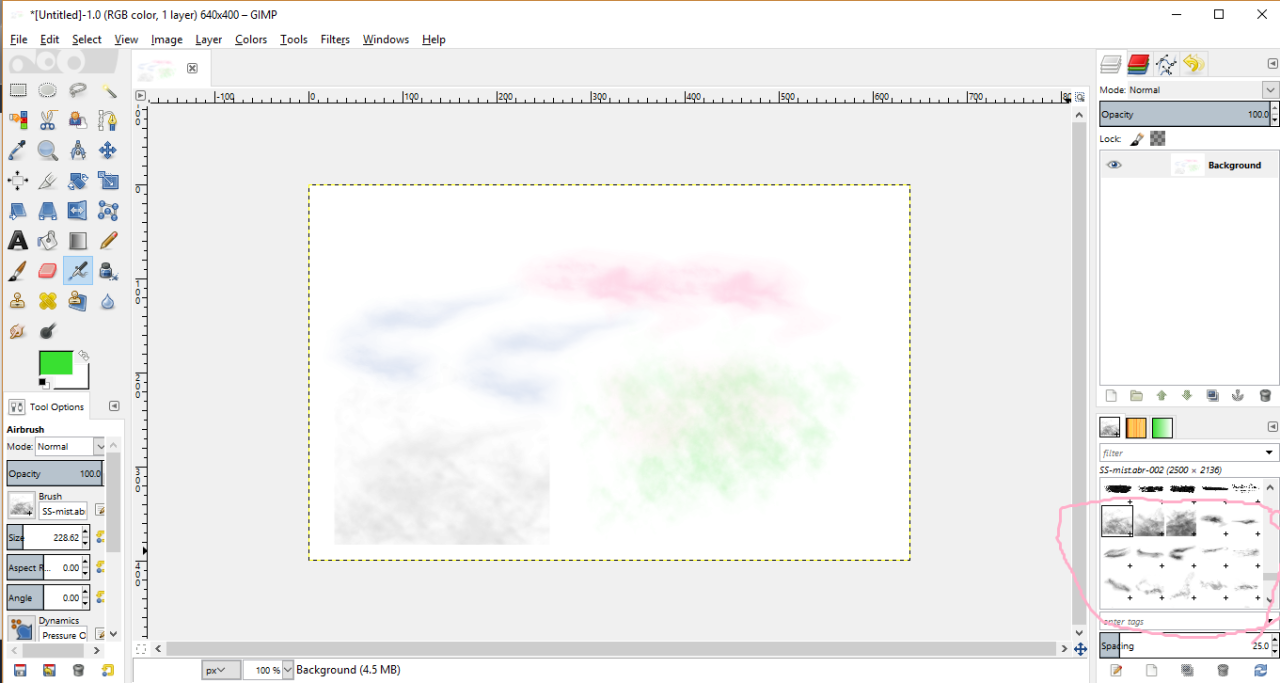
6. Now open your GIMP and you can play with your new brush. If the brush is not there try to refresh it. I play with our new brush. Although there are only 1 file when we extracted, when you want to use it in GIMP there are more than 20 brushes. I circled some of the brushes.
Finally I made another graphic tutorial. I update on layout a lot and almost forgot with graphic. If you dont understand comment below, I'll help you. I'm not updating tomorrow so I'll back this Saturday.
Yeah finally I'm back with graphic tutorial. In this tutorial I will teach you on how to installing fonts, brushes to your GIMP. These two are very useful in making a graphic especially fonts. After this you can add fonts and brushes by yourself.
1. FONTS.
1. Firstly you have to download. For fonts I recommend you to download from 1001 Fonts and Dafont. You can download from other websites too. So I choose Dafont.
2. Scroll until you found Always In My Heart, if you can't find it, click here. Then click on Download. Save your font in any folder that easy for you to find after this.
3. Now open the folder that have the downloaded font. Double click on it or open it in WinRAR or ZIP software, we're going to extract it from zip file.
4. Click on the one saved in ttf (true type font) file format. Then click on extract.
5. Save the text file in the same folder as the original Zip file.
6. Now open Control Panel. Click on Fonts.
7. Drag the file that we extracted just now from folder to Fonts in Control Panel. You can copy and then paste at fonts.
8. Your new font file is there. Now when you open your GIMP, you can find your new font.
2. BRUSHES
1. For brushes, there are lot of websites that you can find for brushes. You can search for GIMP brush or Photoshop brush. Photoshop brushes can be used in GIMP. I usually search for brushes in DeviantArt. Now open the site, DeviantArt. After you open it type GIMP brushes or GIMP brush then click on Search. You will get this.
2. Scroll down until you found Mist Photoshop and GIMP Brushes, if you can't find it click here. Download the file, save it to any folder that easy for you to find it later.
3. After the file downloaded, open the folder that have the file. Open the file in WinRAR or ZIP software. Yes, we're going to actract the file too, unless the file is already in .abr file format.
4. Now we're going to extract the file, but not in the same folder as the original zip file. We have to extract it in our gimp software folder. Please follow one by one because it might be confusing.
Folder order... Your hard disk (C:) ► Program Files ► GIMP 2 ► share ► gimp ► 2.0 ► brushes
5. Here is your file. You can view it after done extracted it. You also can extract file in the same folder as the original zip file and then copy/move it to the gimp software's brush folder.
6. Now open your GIMP and you can play with your new brush. If the brush is not there try to refresh it. I play with our new brush. Although there are only 1 file when we extracted, when you want to use it in GIMP there are more than 20 brushes. I circled some of the brushes.
Finally I made another graphic tutorial. I update on layout a lot and almost forgot with graphic. If you dont understand comment below, I'll help you. I'm not updating tomorrow so I'll back this Saturday.
Layout by minocha99 | 2017

To all subbies~~ Finally i'm back! My semester break has start since last two weeks but i was busy and just got my free time. I'm not sure how many updates i can make. But I try my best to update as many as i can. I haven't finish my render too. I just try to finish it as soon as i can.
Comments