[TUTORIAL] 3D effect!
❥ The P H O T O S H O P Geek ❣ Photoshop tutorials; WE'RE BACK!!3D effect!
This is gonna be a looooooooooooooooooooooong chapter! OwO since we are gonna talk about a lot of things! XD
BEAR WITH IT LITTLE UNICORNS~!! XD
For PHOTOS/PICTURES.
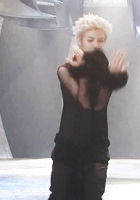
1) Open you picture. I used this. that's my own photography so... yeah! XD

2) turn your photo into black and white! Alt+Shift+Ctrl+B <
3) NOW IT'S BLACK AND WHITE! 8D now Duplicate the layer and lock the first one! likue this!

4) Click on 'Layer 0 copy' then click the fx button below the thing beside the chains thing. then click 'Blending Options'.

follow those bb ;)
5) Then hit V on yer keyboard. then start moving the 'Layer 0 copy' then the 3D effect will now take effect! OuO
I moved mine to the left so yeah.....this ish how it looks likeu~

THAT'S IT FOR THE PHOTO VER.
LET'S GO TO THE NEXT ONE! WHUCH IS 3D EFFCTS ON TEXT!! OWO
For TEXTS
1) Open your Picture something... ouo

I used a black background so you guys can see it more :)
2) now add your text I colored It white.

Tip: When you are going to do the 3d effect on texts use the color white or black NO other color! since the result will be meh.. :P
3) Duplicate your text 2 times and lock the original

4) Now select the layer above the original text layer click the 'fx' button again select Blending Options. the layer style window will pop up.
follow these:
Now move the text to the left side. It will be like this:

5) Now go to the layer on the top most. click fx and blending options like the others a window will pop-up.
follow this:

Move it to the right side AND VOILA!! YOU ARE FINISHED!! OWO
this is how it looks when finished!

ENDDDDDDDDDDDDDDDDDDD! I HOPE YOU GUYS LEARNED A LOT! :) THE BLENDING TUTORIAL WILL BE NEXT! LOOK FORWARD TO IT NEH? ^^
Comments