[TUTORIAL] Comic Book Effect!
❥ The P H O T O S H O P Geek ❣ Photoshop tutorials; WE'RE BACK!!
Comic Book Effect Tutorial!
Hai again guise!! :DDD I'm gonna post a new tutorial for you! :)
this is the method or effect that I used on SMIZE's first layout poster! hope you have fun learning this!
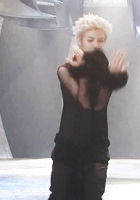
1) To start you need to open your picture on photoshop, I will be using one of this photoshoot of Lee Hi (I love her so much and I’m listening to her while making this tutorial,LOL).

2) Add a psd to your picture or just play with the adjustments and all! after right click one of the layers and select merge all visible.
3) Duplicate your photo (right click then select duplicate layer) then name the new layer 'film grain'.
4) After that go to Filter>Artistic>Film Grain. You can leave the default setting (GRAIN: 4, HIGHLIGHT AREA: 0, INTENSITY: 10)
or you can adjust it because it depends on what kind of photo you used. here is what mine looks like:

my settings is.
Grain: 5
Highlighted Area: 13
Intensity 10
5) Now again duplicate the 'film grain' layer and name it half tone.

6) To give the comic book effect go to Filter>Pixelate>Color Half Tone. And send the Max radius to 4 and leave the rest alone. then click OK.
It should look like this:

7) And set the blending of the "half tone" picture to DARKEN.

8) Add some text I used the font Lobster 1.4

9) Now with the Rectangular marquee tool create a shape on ur photo (Select an are or whatever) like this:

10) Create a gradient map by clicking the adjustment circle (The black and white circle on the bottom of your layer palette)
select any gradient you like now my picture looks like this:

AND NOW YOU ARE FINISH!!!!! YAAAAAAAAAAAAY!
THANKS FOR VIEWING THIS TUTORIAL GUYS! I HOPE YOU LEARNED SOMETHING FROM THIS! SEE YOU!
Comments