[TUTORIAL] Using Color Palettes
Repost from DUO Resource Center Batch 1
I'm not very good at explaining, but I'll try my best to keep
y'all alive with this LOL. And hopefully you guys will learn
something from my half-assed teaching.
Please do not feel limited by these steps. Feel free to go
above and beyond, edit/adjust as you wish, and use any
resources out there. I am simply laying the basic steps and
did this with little complications as possible.
————————————
Let me start off saying that you do not ever need to use every
single color on the palette. Heck you can use 1 if you want to!
If you need a nice background color to start your poster, hell
color palettes will help too!
YOU WILL NEED
1. Hyori's Photo
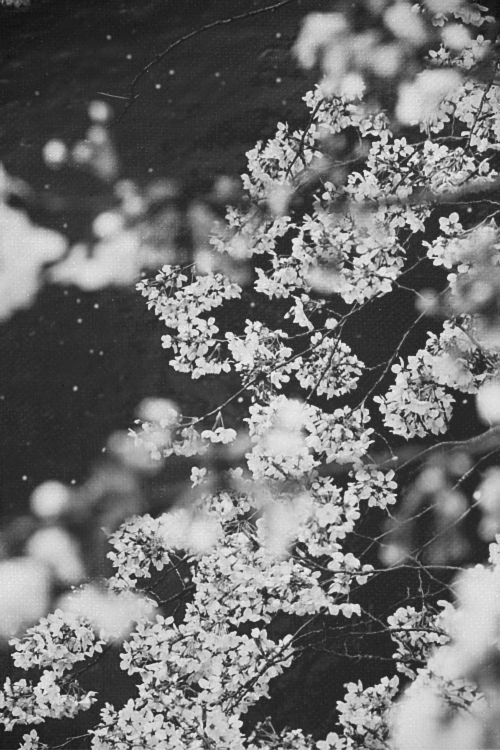
2. Flowers Stock Photo
3. La Tribune CP (font)
4. Color Palette #1 by Palama :)
Simply right click and choose "Save Image As."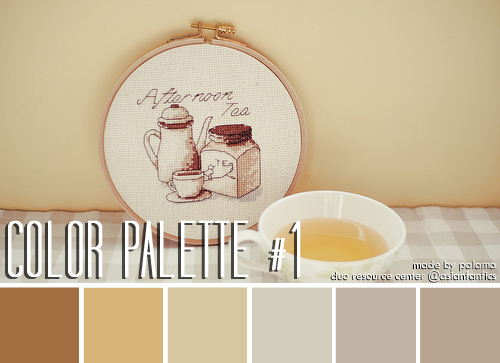
————————————
1. Open Hyori's picture and duplicate it once. Set the blending mode of the
duplicated layer to Soft Light. (I also cropped Hyori's picture so the width
is exactly 500px... just to make it nice and round LOL).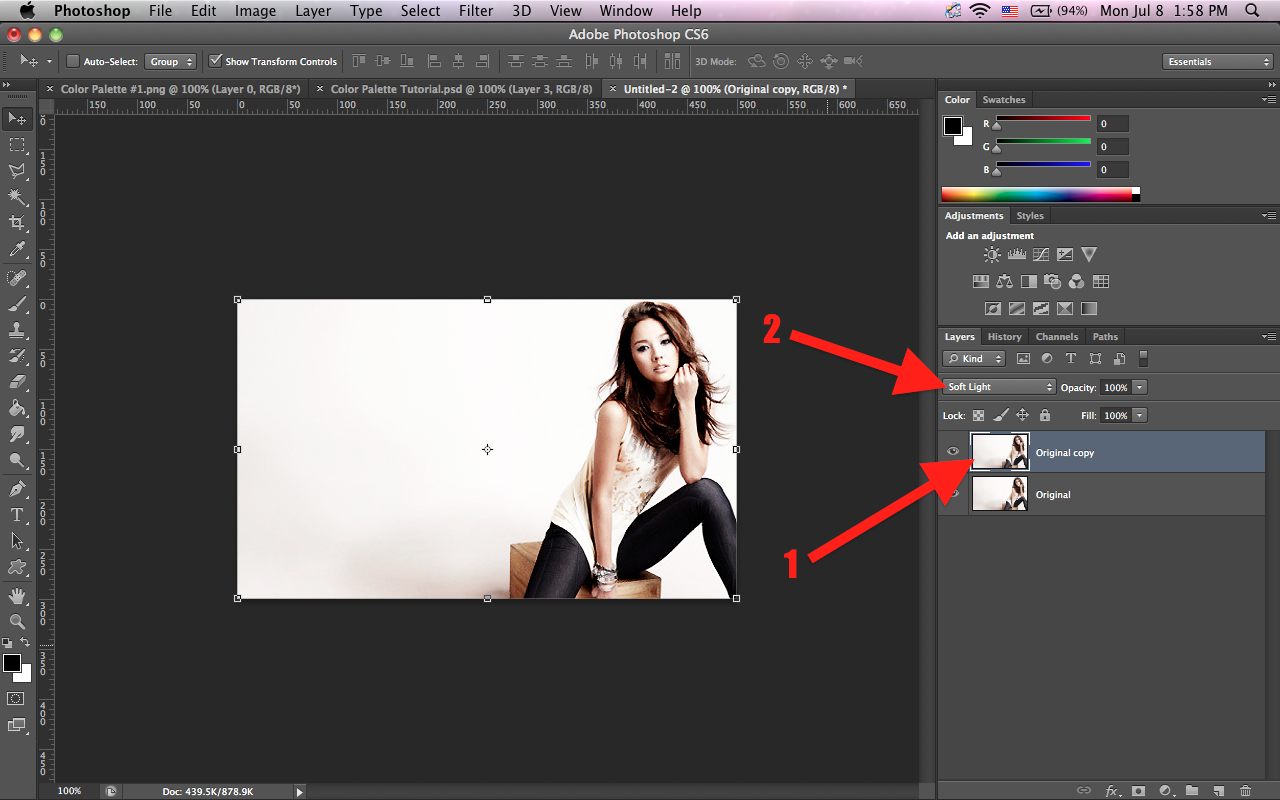
2. Now open the color palette, click the eye dropper tool, pick the 4th color
over from the left (the lightest gray). We'll name the colors 1-6 starting
from the left, kay?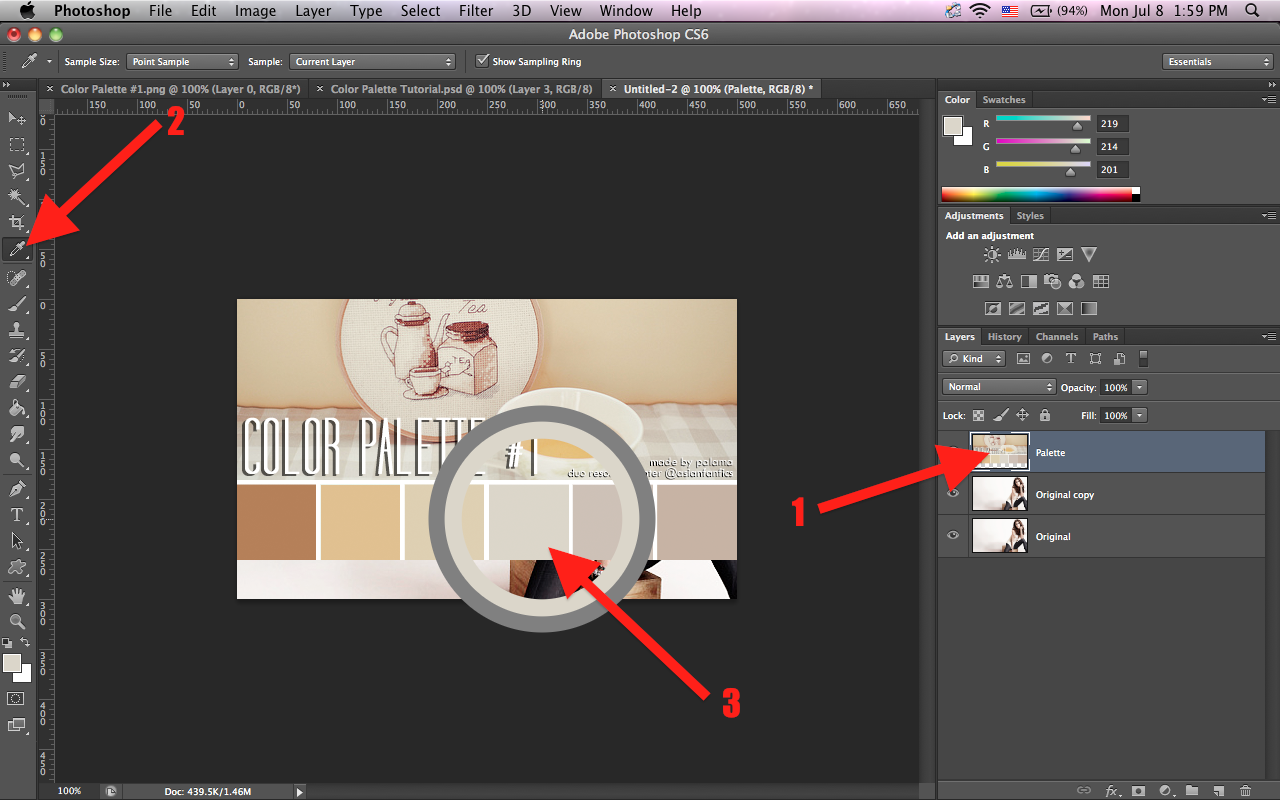
3. Select the bottom layer, click the B&W circle at the bottom panel, and
select solid color. This will create a fill layer of the color you've just selected. 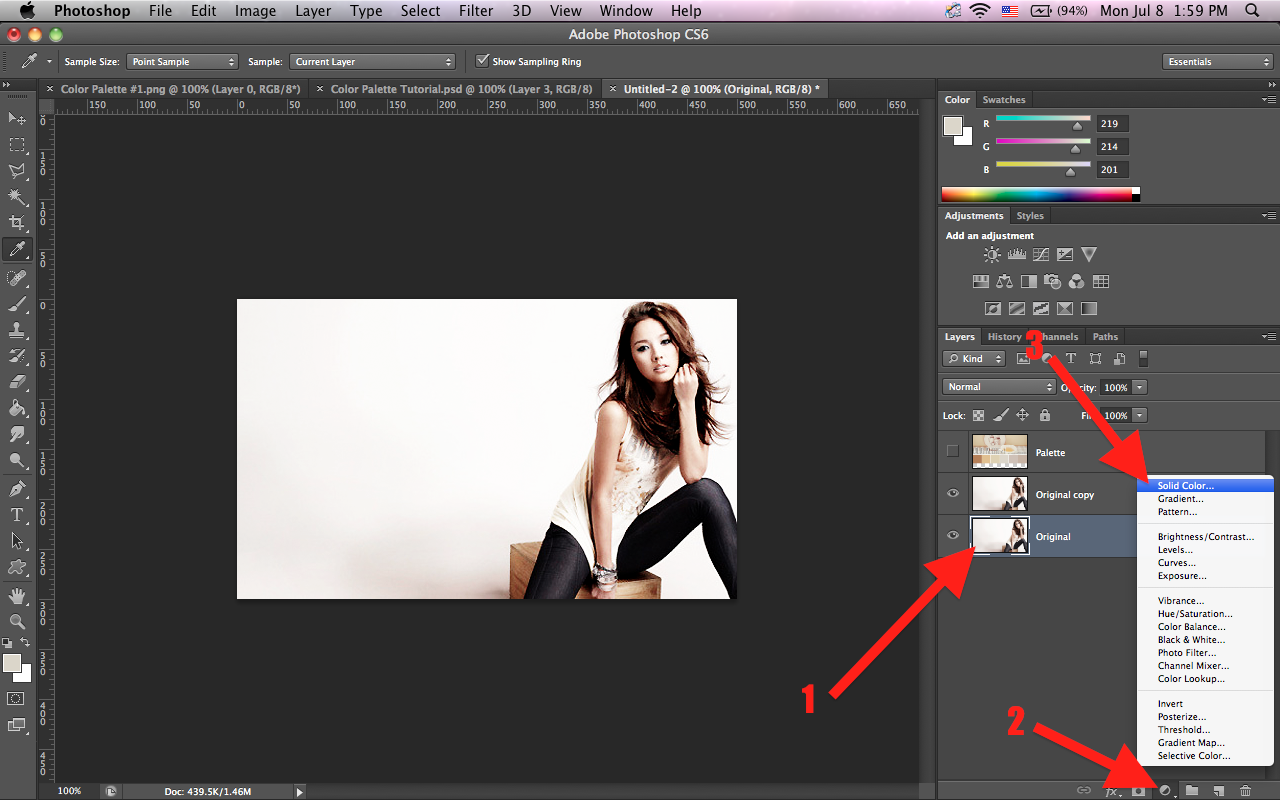
4. Now change the blending mode of that fill layer to Color Burn. Then pick
the 3rd color in the palette and create another fill layer. Set that layer's
blending mode to Multiply, and opacity to 90%. 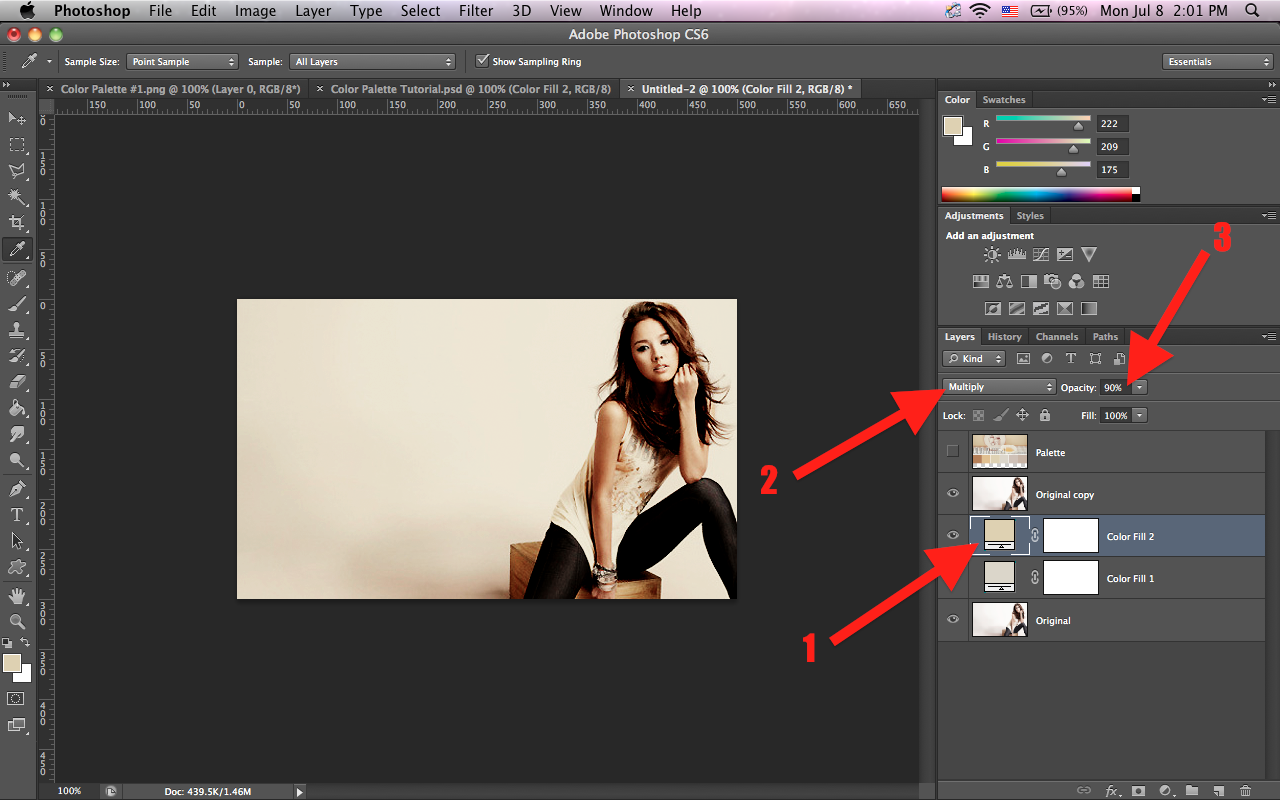
5. So far so easy; now gets real. Select the duplicated picture layer, click
the Magic Wand tool and select the background around Hyori. Do the best
you can to remove as much BG as possible. Hold Shift to select multiple areas.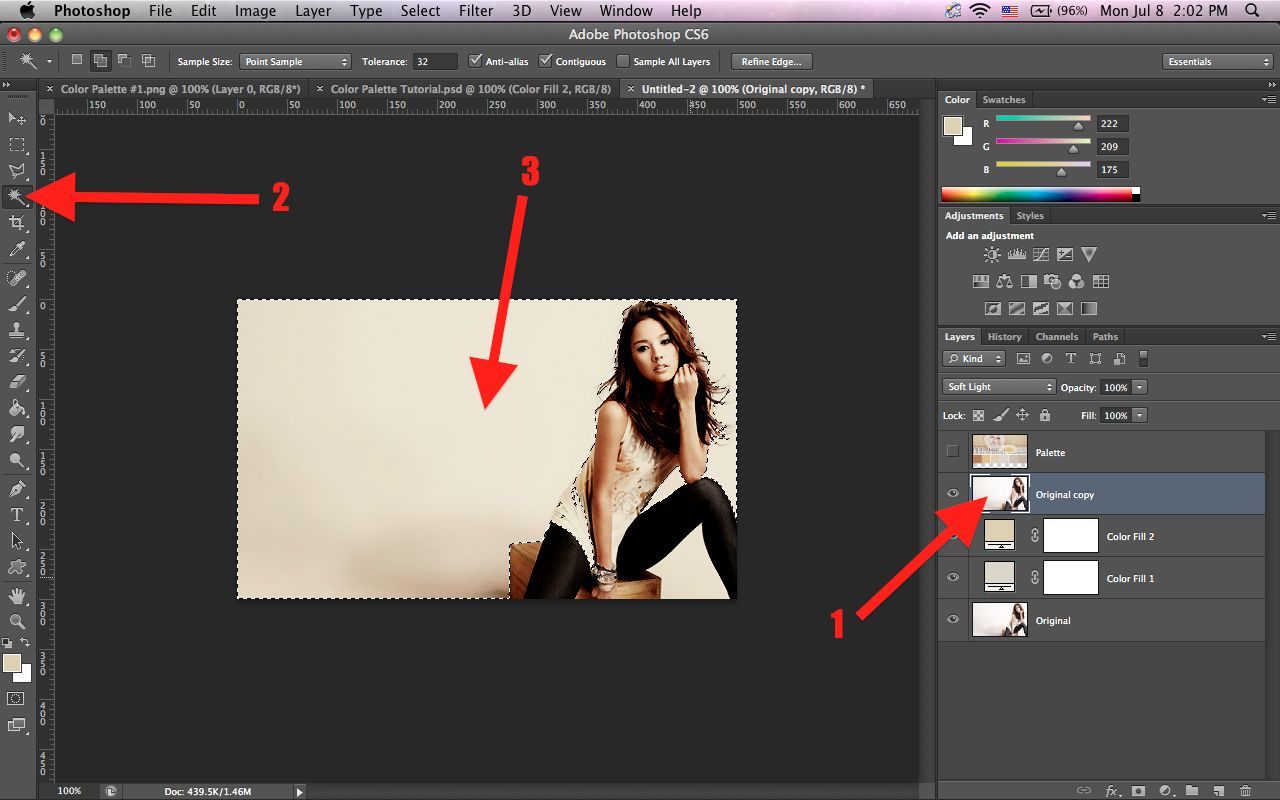
6. With the areas selected, right click on the canvas and select Select Inverse.
Then with your inverted selection outlined, select Color Fill 2's layer mask,
pick the Paint Bucket tool, set your Foreground to black, and click anywhere
withinthe outlined area (which is basically Hyori herself).
You should see that Hyori is brightened after the process.
7. Deselect your selection (right click with the magic wand tool). Make sure
you're still on the layer mask, select the brush tool, change your foreground
to white, change the brush size to something small, and opacity to around
60%. Briefly paint over the white parts around the ends of her hair.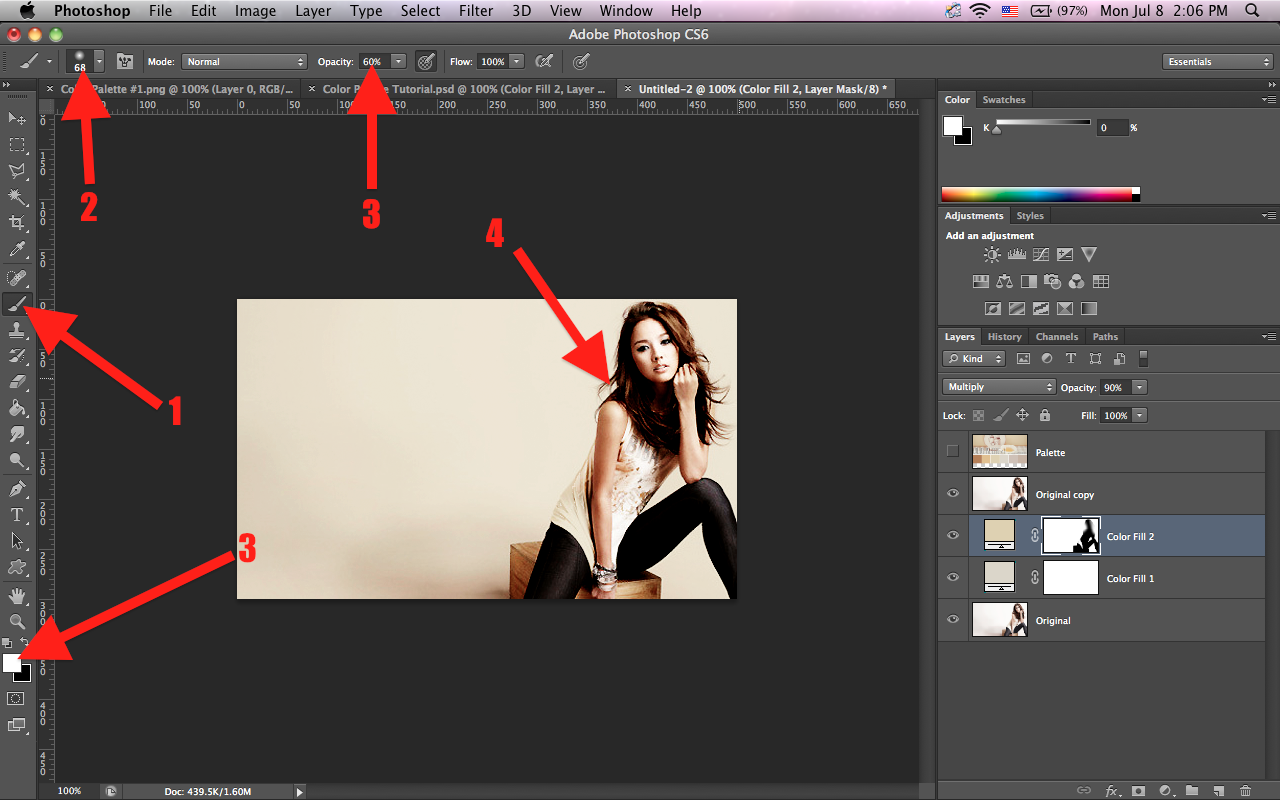
8. Now create a gradient layer with the 1st color in the palette (click on the
B&W circle and select Gradient). Set that layer's blending mode to Darker
Color and opacity to 85%.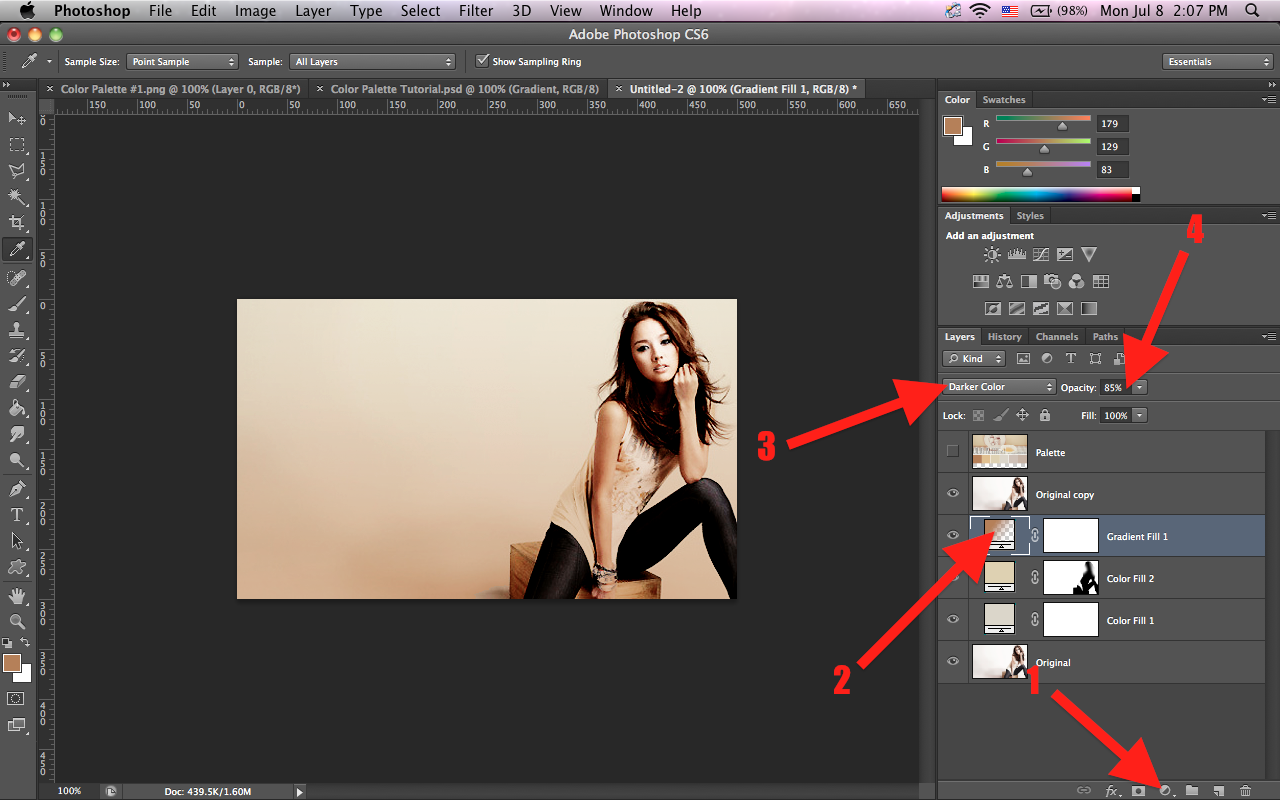
This is what the pop up box should look like when you click Gradient.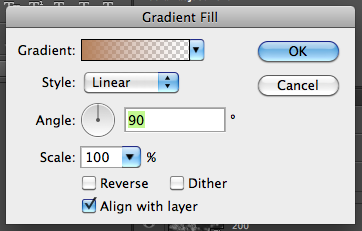
9. Again, with the layer mask selected, briefly brush over Hyori's skin with
black to make her look brighter.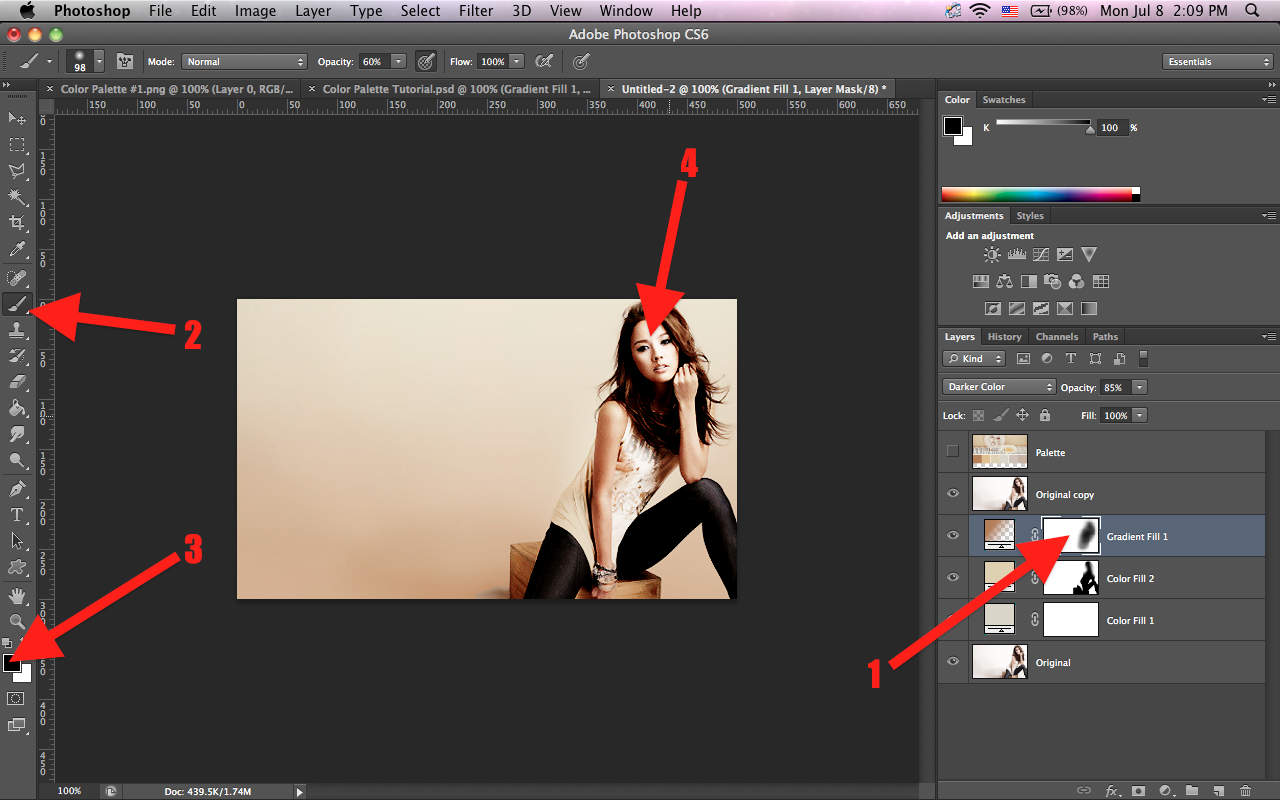
10. Create another Soft Light color fill layer with the 5th color in the palette.
Make another Soft Light color fill layer with the 2nd color, but this time set
the opacity to 30%. Now the canvas should look like this.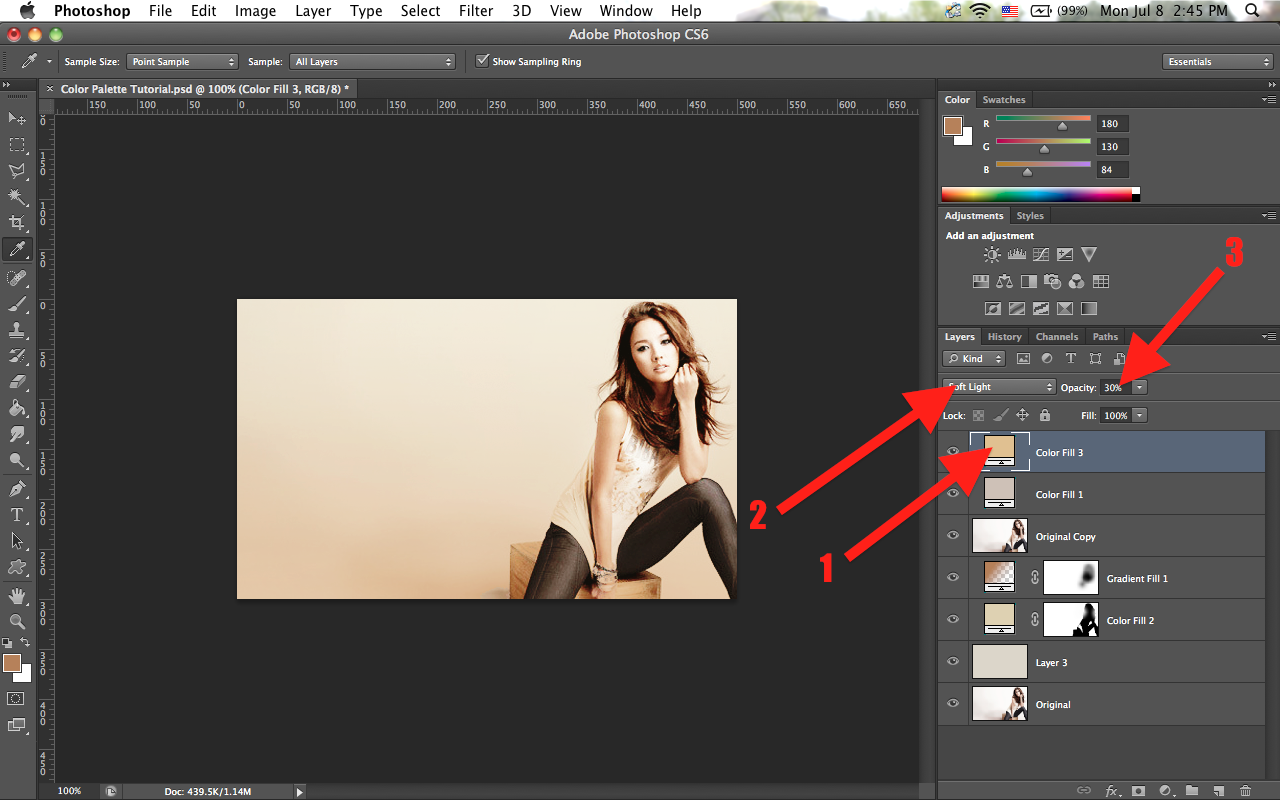
11. Open the stock photo and arrange as you like, then change the blending
mode to Screen. I went back and sharpened the orginal picture of Hyori and
changed the opacity to 85% because the result came out a bit blurry. Now
you're pretty much done!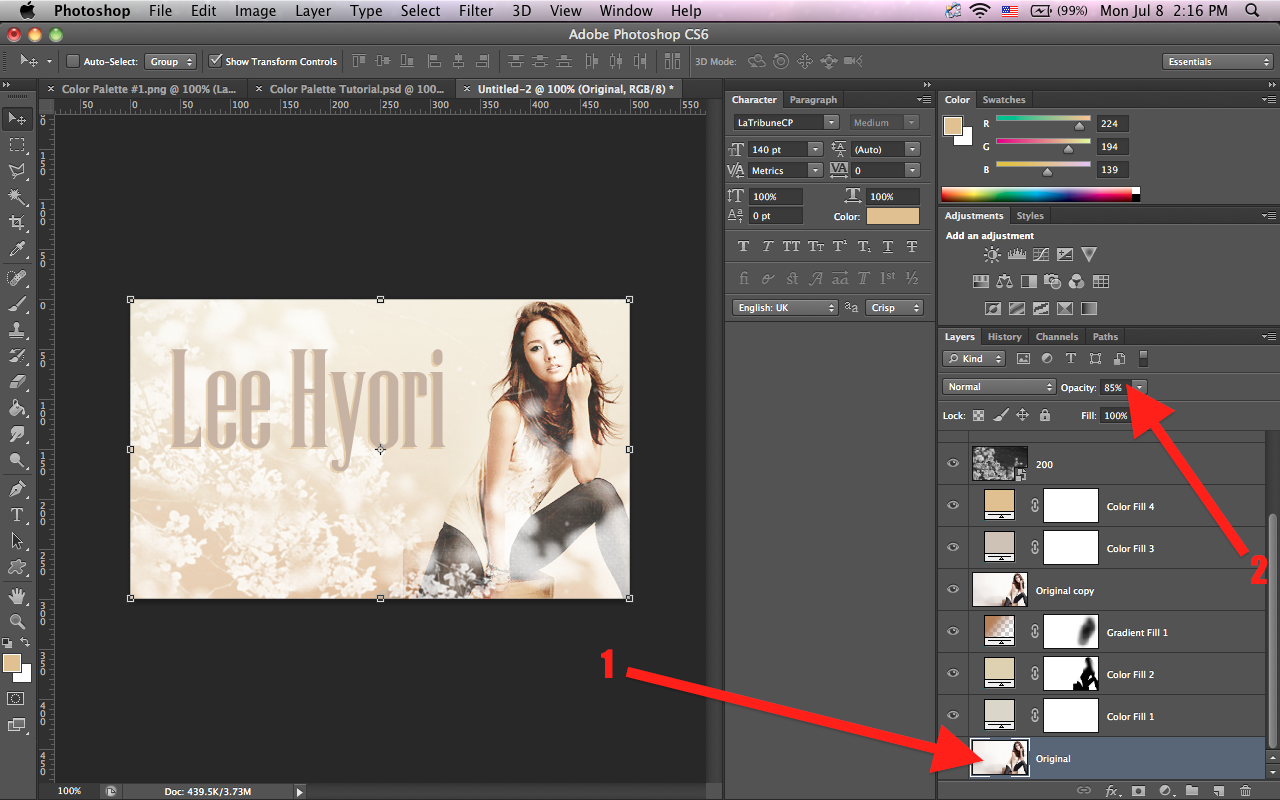
12. If you want to add the text like I did, pick the last color and use La
Tribune CP font in 140px. Then duplicate that layer and change the font
color to the 2nd color on the palette and change the opacity to 65%. Lastly,
move that layer below the first text layer, and move it just a little bit left
and down.
YOU'RE DONE :D
Final Result (before and after):
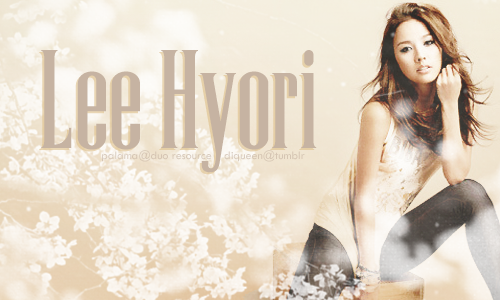
Sorry there's a lot of steps and it was quite confusing. I tried T^T
————————————
IF YOU HAVE QUESTIONS, JUST ASK ME. HOPEFULLY YOU
GET HOW TO USE COLOR PALETTES NOW. I KNOW A LOT
OF PEOPLE OUT THERE WHO DON'T KNOW HOW TO USE
THEM, SO THAT'S WHY I MADE THIS.
Feedbacks, questions, comments, etc. are always
welcomed!
--PALAMA
Comments