Haha I found one of my tutorials that I did
I'm copying this from my livejournal...
---
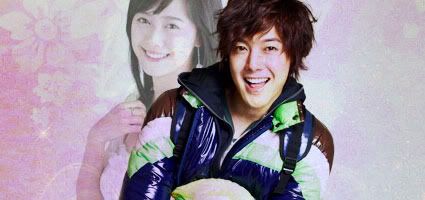
Alright out of sheer bordom... I'm actually going to do a tutorial for the following image...
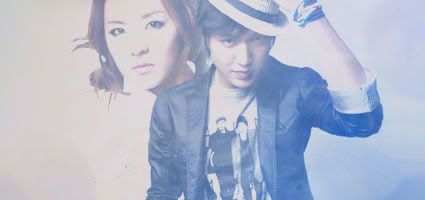
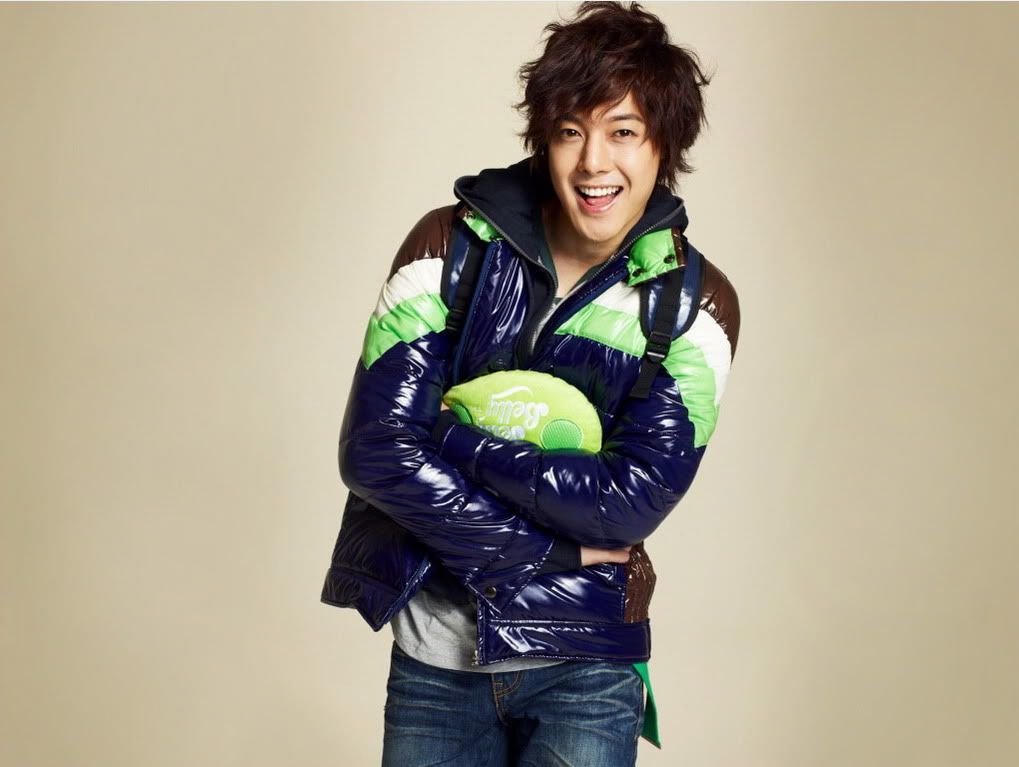
o1. You are going to need two images. Particularly both of light solid backgrounds and are somewhat similar in color (I suggest for the fading images you want to have a white background). I'm actually not going to be using Lee Min Ho and Sandara Park for this tutorial because I sadly didn't save the PSD file. So instead I'm going to be using Kim Hyun Joong and Goo Hye Sun. You are also going to have to make a new canvas with the size 425x200. Those are the dimensions we shall be using with the tutorial.
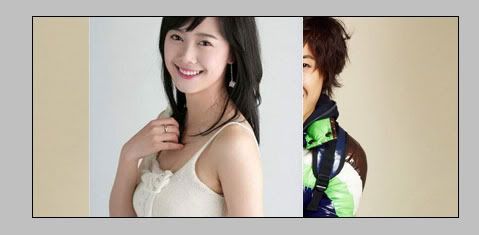
o2. Paste both of the images onto your new blank canvas and resize your images to your liking. The one that should be on the bottom layer is the one you actually was to be more in focus. In my case, I want Hyun Joong to be focused and Hye Sun fading. As a result, you should have something somewhat similar to this. Now you're going to have to play with the settings of the top layer (in my case.. Hye Sun)... and set it to Darken. So now it should look like this. If your second layer that's supposed to be fading doesn't have a white background... don't worry... you'll be able to fix it in the next step.
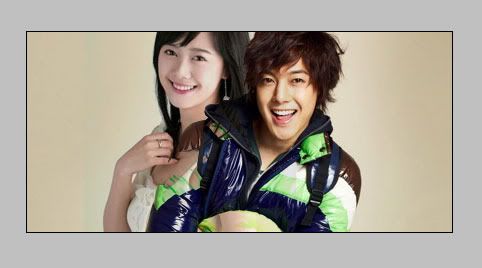
o3. Now you notice how some of Hye Sun is fading into Hyun Joong? But there are some parts that are prevented from fading. You will have to erase the parts you don't want. And you could do this in two different ways. You could do it with the eraser tool or you could put a layer mask on the Goo Hye Sun layer (I'm getting tired of saying fading layer and focus layer) and use the brush tool to use it. (Remember black to erase, white to recover if you're doing the layer mask.) Though personally I suggest using the layer mask because then you could fix any mistakes. So after some erasing it should look like this. Set Goo Hye Sun's layer to 70% opacity.
o4. Before everything with the texture and such, I created a new layer and did Ctrl+Alt+E so it flattens everything together but you will still have your previous layers. This shall now serve as the base layer. Duplicate your base layer and set it to Screen 70%. So now it should look like this.
o5. It is now time for the texture layer. Overall, you could actually use any texture but for mine I'm actually going to give you the texture I used as well. Anyways, I used a texture made by JRMB-Stockon deviantart. And set it to Multiply 100%. You might have to resize and move it around a bit though. This is what it should somewhat look like if you used the same texture and adjusted it's position and size the way I did.
o6. Duplicate your base layer and bring it to the top. Then set it to Soft Light 50%. I ended with this.
o7. This set is entirely optional. But if you want... you can put a layer mask on the texture and use a small soft brush erase from the face and skin. With doing that... I ended up with my final product being this....

You are now also free to add text and such if you wish.
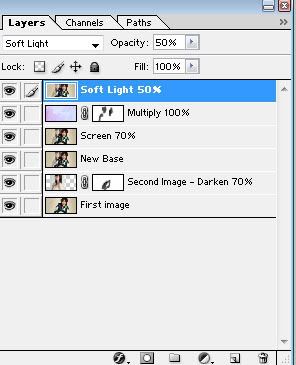
As a recap... here's what each layer should look like on the list of layers.
Comments