Tutorial 01 - Simple Romance/Drama Poster!
▼ LAVISH POSTER AND TUTORIAL SHOP ▼ || BUSY/SEMI-HIATUS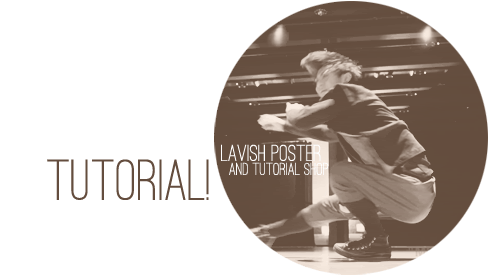
tutorial 01 - simple romance/drama poster!
Tutorial: Simple Romance/Drama Poster
Difficulty: Basic | Easy | Standard | Advanced
Program: Photoshop CS5
{suitable for those kinda new to PS}
Hello everyone! Panda here! Say hello to our first Photoshop tutorial! Today I’ll be showing you guys how I made MollaDongsaeng’s poster for her story The Girl in the Trash Bag! I made this poster for Shattered Sanity Designs, as I’m a staff member. This tutorial is relatively simple and I’ll be showing you what I usually use and the methods I go through to create these simple yet appealing posters!
1) Alrighty! Open up Photoshop and go to File>New and make a new canvas! I made mine 550x660 but you can do whatever size you like :3
2) Now I’ve got 4 pictures I’m going to use, which are of G-Dragon, an ulzzang, Daehyun and Youngjae. Use whatever pictures you want here, but I used sort of close ups of their faces because It makes it much more atmospheric! :D
Take your rectangle tool  and make a new layer on top of the background, and then make a box selection near the top of the canvas and fill it with a colour. I made mine red!

3) Now, with your rectangle still selected (with the marching ants still marching xD), create another layer and use the move tool (above the rectangle tool) to drag it down the canvas below your first box and fill that with another colour!

4) Repeat this for two more boxes and you now have where we will put our pictures!

5) Okay so the first box is where I’m going to put G-Dragon. Open up his picture and it should pop up in a new tab along the top. If you click and hold his tab, and then drag it downwards and let go, it should appear in a window like so…

6) So with the Move tool again, click and drag his picture onto our canvas, and you can now minimize that window. On the layers palette, find the opacity slider.

Take that slider down to about 40% so that we can see where we’re positioning G-Dragon in his little box! :3 I re-sized G-Dragon a little, and to do this select the rectangle tool we used earlier and right click anywhere on your canvas, and then select Free Transform. You can now change the size of your picture, but you need to make sure you keep the dimensions locked otherwise your picture will look warped, so to do this, hold Shift as you drag the corners in diagonally and it’ll keep the picture looking normal!

7) Okay, so when you have your picture aligned, turn the opacity back up to 100% and then find the Add Layer Mask button on the layers palette.

And you should get something like this

Now, make sure your rectangle tool is selected, and press and hold Ctrl and click on the thumbnail of your red box in the layers palette (the little picture), and then right click on the canvas again but this time select Select Inverse. This will select the area around the red box! Then get your paintbucket tool, with black as your foreground colour, and click on the canvas. This Layer Mask will hide anything on the layer that is covered with black, and should give you this

And there’s G-Dragon sorted! You can now hide or delete the layer of your red box by clicking the eye next to the thumbnail, or selecting its layer and hitting the trash can in the far right corner.
8) Repeat steps 5-7 with the other pictures and it should get you something similar to this

Now we can get down to the creative stuff!!
9) Okay, for the background, I’m going to use this texture, and open it up and drag it onto your canvas like you did with your pictures. Because this texture is landscape, I went to Edit>Transform>Rotate 90° CW, and moved it to my liking. (Note: I changed the positions of my pictures because of where I wanted the text so it’s a little different now.)

10) Okay, now to adjust some settings. Because it’s a romance I want to make it light and delicate but warm too. So firstly go to Layers>New Adjustment Layer>Curves, press Okay, with the following settings…

And again, Layers>New Adjustment Layer>Brightness/Contrast with the settings…

And then Layer>New Adjustment Layer> Selective Colour with these settings…


And then another Layer>New Adjustment Layer>Curves…

And that should get you something similar to this!!

11) Okay, I’m not feeling it with the pictures being that clear, and because the genre of the story was romance/drama, I feel like this needs an air of uncertainty about it… So! I’m going to add some motion blur to the pictures! Firstly, select each of the pictures and go Filter>Sharpen>Sharpen, do this for all 4 ^^ Then, select G-Dragon’s layer and press Ctrl+J to duplicate the layer. Then go to Filter>Blur>Motion Blur and use these settings…

Now you have that blur layer, set it’s opacity to 65%, and make sure you drag the layer in the layers palette down so that it’s below all the adjustment layers we made. Next we wanna make sure G-D’s face is still pretty clear and distinguished, so click the Layer Mask button we used before. Then, with a brush of size 112px, 0% hardness and about 40% opacity, make quick clicks over his face, but don’t go mad, we still need it to look hazy. You should turn out with something like this!

Repeat this step with the rest of the pictures(remembering to bring the layers in the palette down beneath the adjustment layers) it should look similar to this!

12) Okay, so now we have some atmosphere, it’s time to get funky with our resources! I’m gonna pop this texture on top, using the same Open>Drag and pull onto canvas method we used in step 5, and you can mess around with this, place them wherever you want. I’ve decided to duplicate it and put them both here…

And then set the Layer Blend mode to Screen on both with an opacity of about 30%

And you should get something like this! (although you can’t see it too well here…)

13) Okaayyy now for some text! Try and choose different fonts other than the default ones that come with your pc/laptop. You can find good ones on dafont.com, which is where I get most of mine. The fonts I’m using are Before the Rain and Tall Dark And Handsome in standard black colour.

Feel free to play about with their positioning! Now for the title. I’m still using Before the Rain, and for the first part of the title, I used the colour #904518. Then for the second part, I double clicked on the text layer itself in the layers palette, to bring up a window called Layer Style. Check Gradient Overlay, and with the following settings.

To change the colour of the gradient click on the box with the colour gradient in it and then click the small sliders, and then click the coloured box to bring up the colour changer again. (Because my directions are awful, I did a little drawing :3)

The colour for the dark bit is #4f1c06 and the light bit is #ef9f58! And the settings for the is this…

And that should give you this!

14) Okay so the picture’s coming together now, but I’m just gonna make a couple of final adjustments ^^ Go to Layer>New Adjustment Layer>Levels, press okay, and then use these settings…

And then again Layer>New Adjustment Layer>Curves, with….

15) OKAY FINAL STEP. We want a duplicate layer, of all the layers merged together. How do we do this? Simple! Press Ctrl+Shift+Alt+E and voila! Now with this layer, go to Filter>Sharpen>Sharpen aaaaaaaaaannnnnnnddddddddd……

Tadaa~ You have just made yourself a simple but romantic and light poster! Please show us what you’ve done if you tried this tutorial! We’d love to see your work! If you'd like to have a tutorial then please drop a comment down below and we'll see what we can do!!
- Panda ♥ Thanks for reading!! *skips off to complete some more requests*
Comments