lesson 6: Simple Chapter Layout (1)
ドリーミン (Dreamin') Tutorial

now playing NCT127 - Limitless


LESSON 6: SIMPLE CHAPTER LAYOUT (1)
Sorry for the late update, I'm busy and something just happened at my school. My batch and other ex-students were so angry about it. So yeah I'm back with new layout lesson. Someone has asked me for a lesson for simple chapter layout. I made 2 and put in different chapter. Both are simple. For first version, no html or coding knowledge is needed. Just something that can make your story chapter looks better. This layout also mobile-friendly.
1. First click on Center to make our text will start from center.

2. Type Chapter 01 (You may put the title of your chapter too) If you want put the title of your chapter after the step 4. After you put the chapter click enter and click on image.

3. Now copy the image address of this photo.

4. Paste the image address in the url link. I change the height from 42 to 40. If you don't want to change it, it's fine. But if you want to change it make sure the lock is opened or else the width will automatically changed too.

5. Then I click ok and continue add some more same photo. There are 4 photos altogether. It's up to you how much do you want to add but for me 4 is enough because we have to fit it for mobile layout too.

6. Click on enter. Then add your story. But i suggest you to put your text-align to be in justify. It will make your story look neat.

7. After done with your story click on enter again. Then click on Insert Horizontal Line. We are going to separate your story and Author's Note part.

8. Now add Author's Note section. It's up to you wether you want to put the letter to be in uppercase or not, your creativity.

9. Lastly do anything that you want such as change the font size, font name and font colour.
Here is my final result when viewed from my laptop.

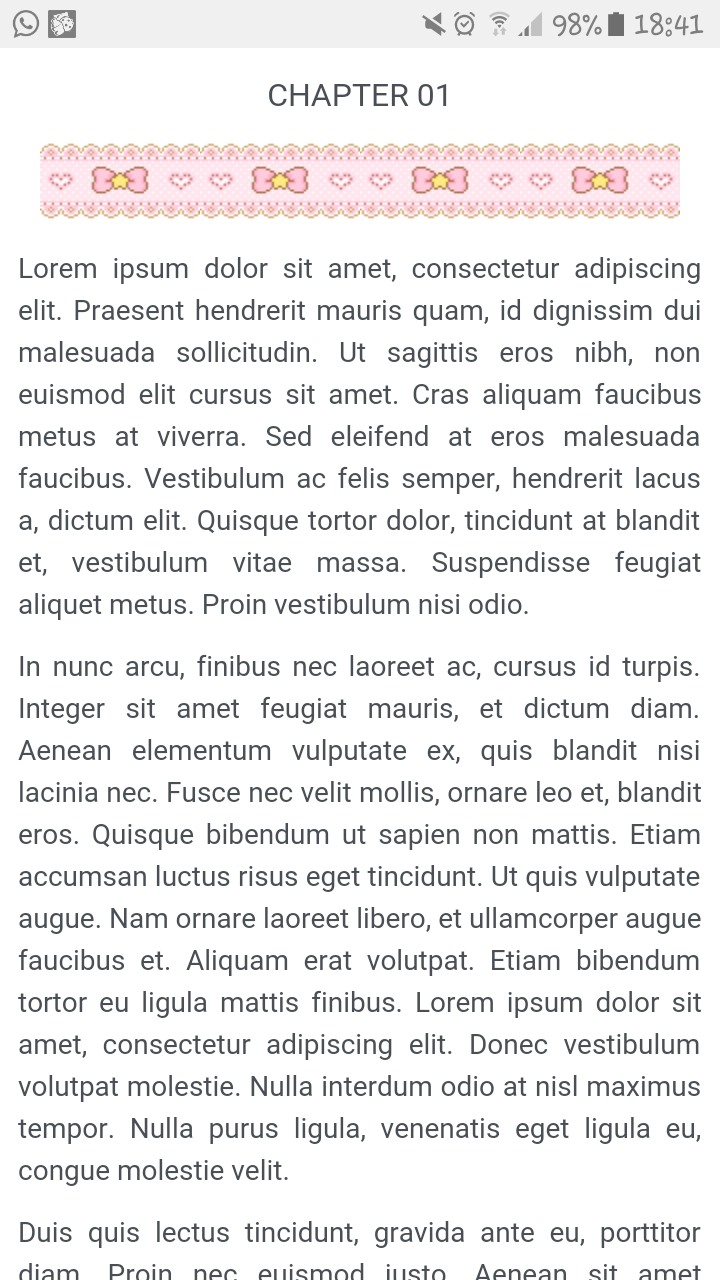
This one is when viewed from my phone. Only half but yeah. Did you see the bow that we added in step 3.
Finally first part done. Sorry for the wait, I'm busy nowadays. i will post the 2nd part asap. Sorry again >0<.
Sorry for the late update, I'm busy and something just happened at my school. My batch and other ex-students were so angry about it. So yeah I'm back with new layout lesson. Someone has asked me for a lesson for simple chapter layout. I made 2 and put in different chapter. Both are simple. For first version, no html or coding knowledge is needed. Just something that can make your story chapter looks better. This layout also mobile-friendly.
1. First click on Center to make our text will start from center.
2. Type Chapter 01 (You may put the title of your chapter too) If you want put the title of your chapter after the step 4. After you put the chapter click enter and click on image.
3. Now copy the image address of this photo.
4. Paste the image address in the url link. I change the height from 42 to 40. If you don't want to change it, it's fine. But if you want to change it make sure the lock is opened or else the width will automatically changed too.
5. Then I click ok and continue add some more same photo. There are 4 photos altogether. It's up to you how much do you want to add but for me 4 is enough because we have to fit it for mobile layout too.
6. Click on enter. Then add your story. But i suggest you to put your text-align to be in justify. It will make your story look neat.
7. After done with your story click on enter again. Then click on Insert Horizontal Line. We are going to separate your story and Author's Note part.
8. Now add Author's Note section. It's up to you wether you want to put the letter to be in uppercase or not, your creativity.
9. Lastly do anything that you want such as change the font size, font name and font colour.
Here is my final result when viewed from my laptop.
This one is when viewed from my phone. Only half but yeah. Did you see the bow that we added in step 3.
Finally first part done. Sorry for the wait, I'm busy nowadays. i will post the 2nd part asap. Sorry again >0<.
Layout by minocha99 | 2017

To all subbies~~ Finally i'm back! My semester break has start since last two weeks but i was busy and just got my free time. I'm not sure how many updates i can make. But I try my best to update as many as i can. I haven't finish my render too. I just try to finish it as soon as i can.
Comments