PayPal Business Tutorial
This tutorial is for helping approved crowdfund authors set up a way for their supporters to directly send them funding on a monthly basis through PayPal. A business account is required over a personal one because only business accounts allow you to create monthly subscription buttons for predefined amounts (eg. $1 per month) and for PayPal to automatically subscribe new supporters to your tiers by letting us know of new subscribers. These are similar steps to how you would start your own online shop or business and the information here can be useful for that purpose as well.
Please ensure you also complete the Activate Instant Payment Notifications (IPN) step or else you will be solely responsible for manually including your supporters to the tiers they paid for!
- Setting up a PayPal Business account
- Transaction fees and how to reduce them
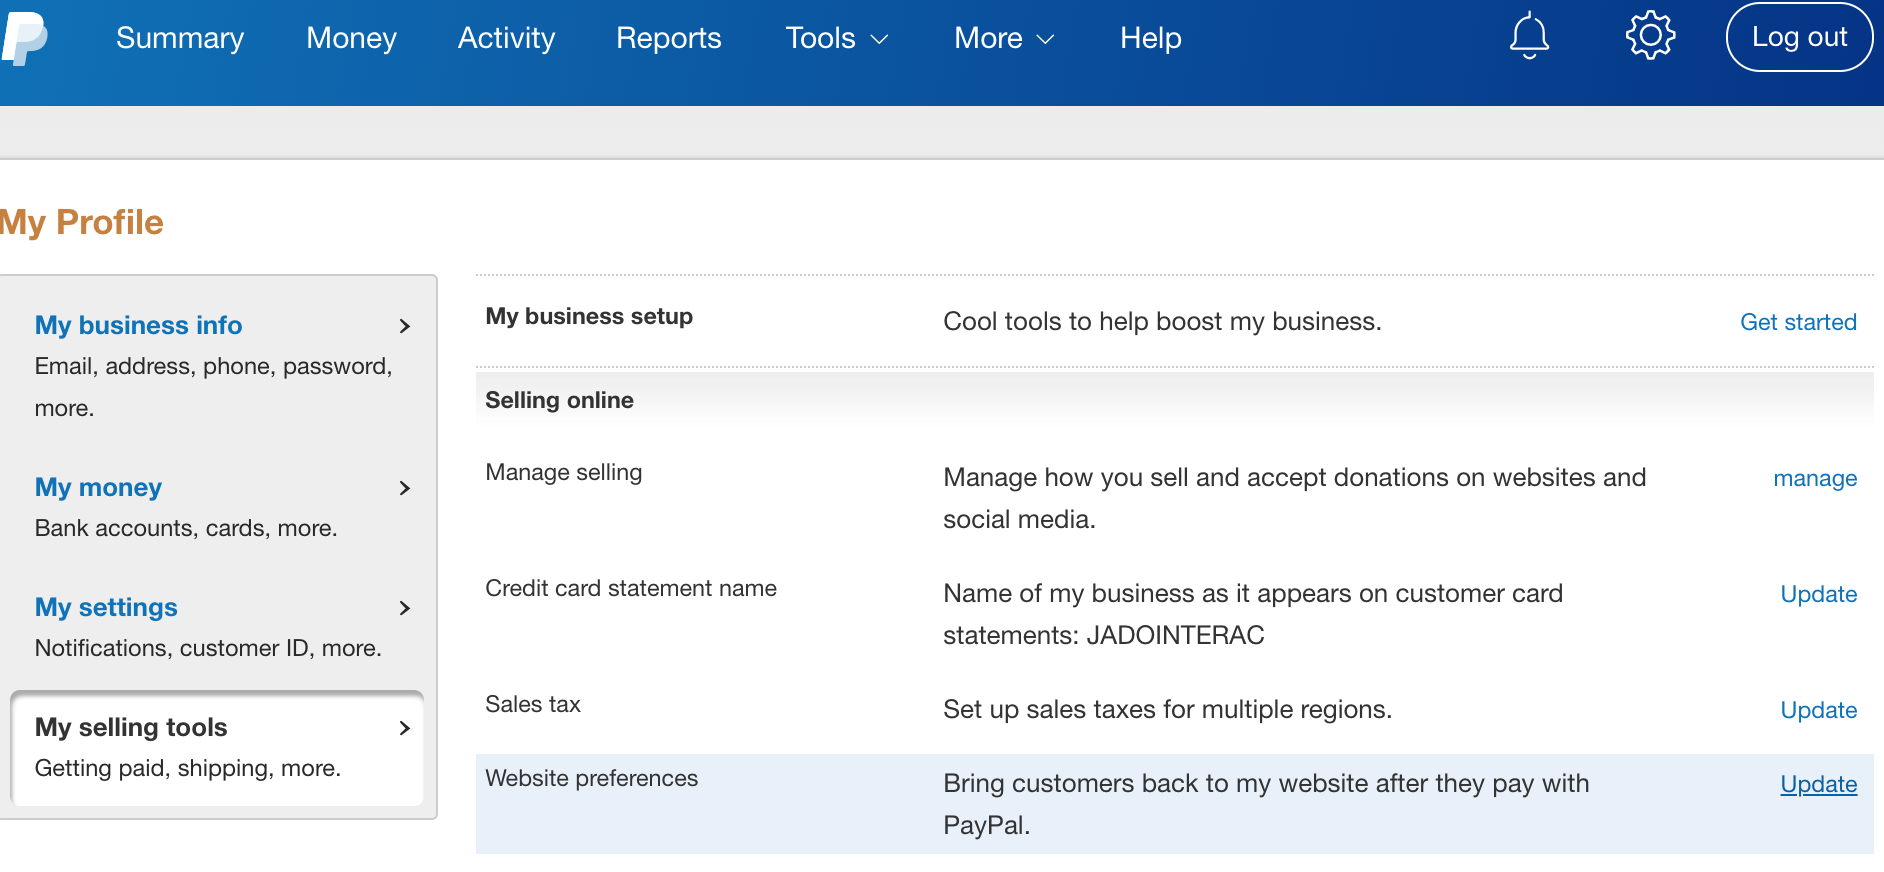
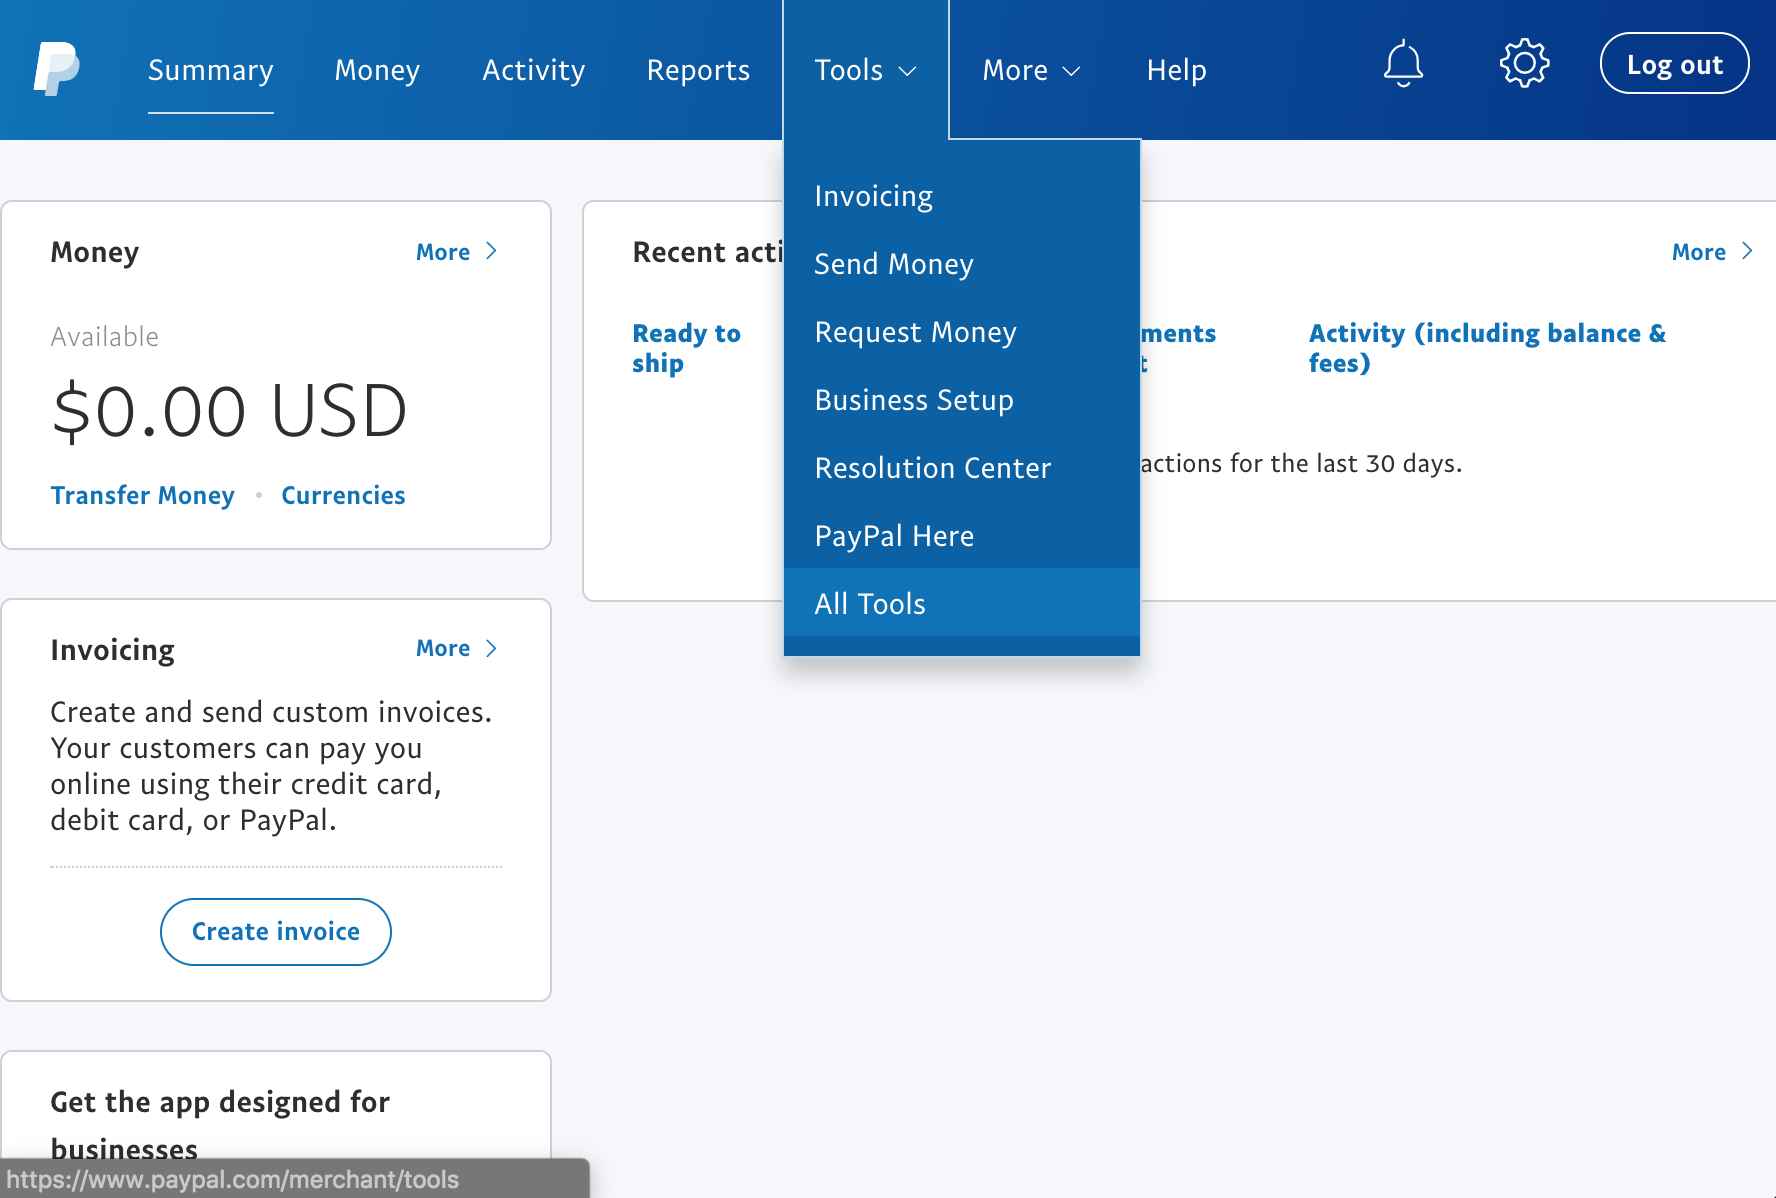
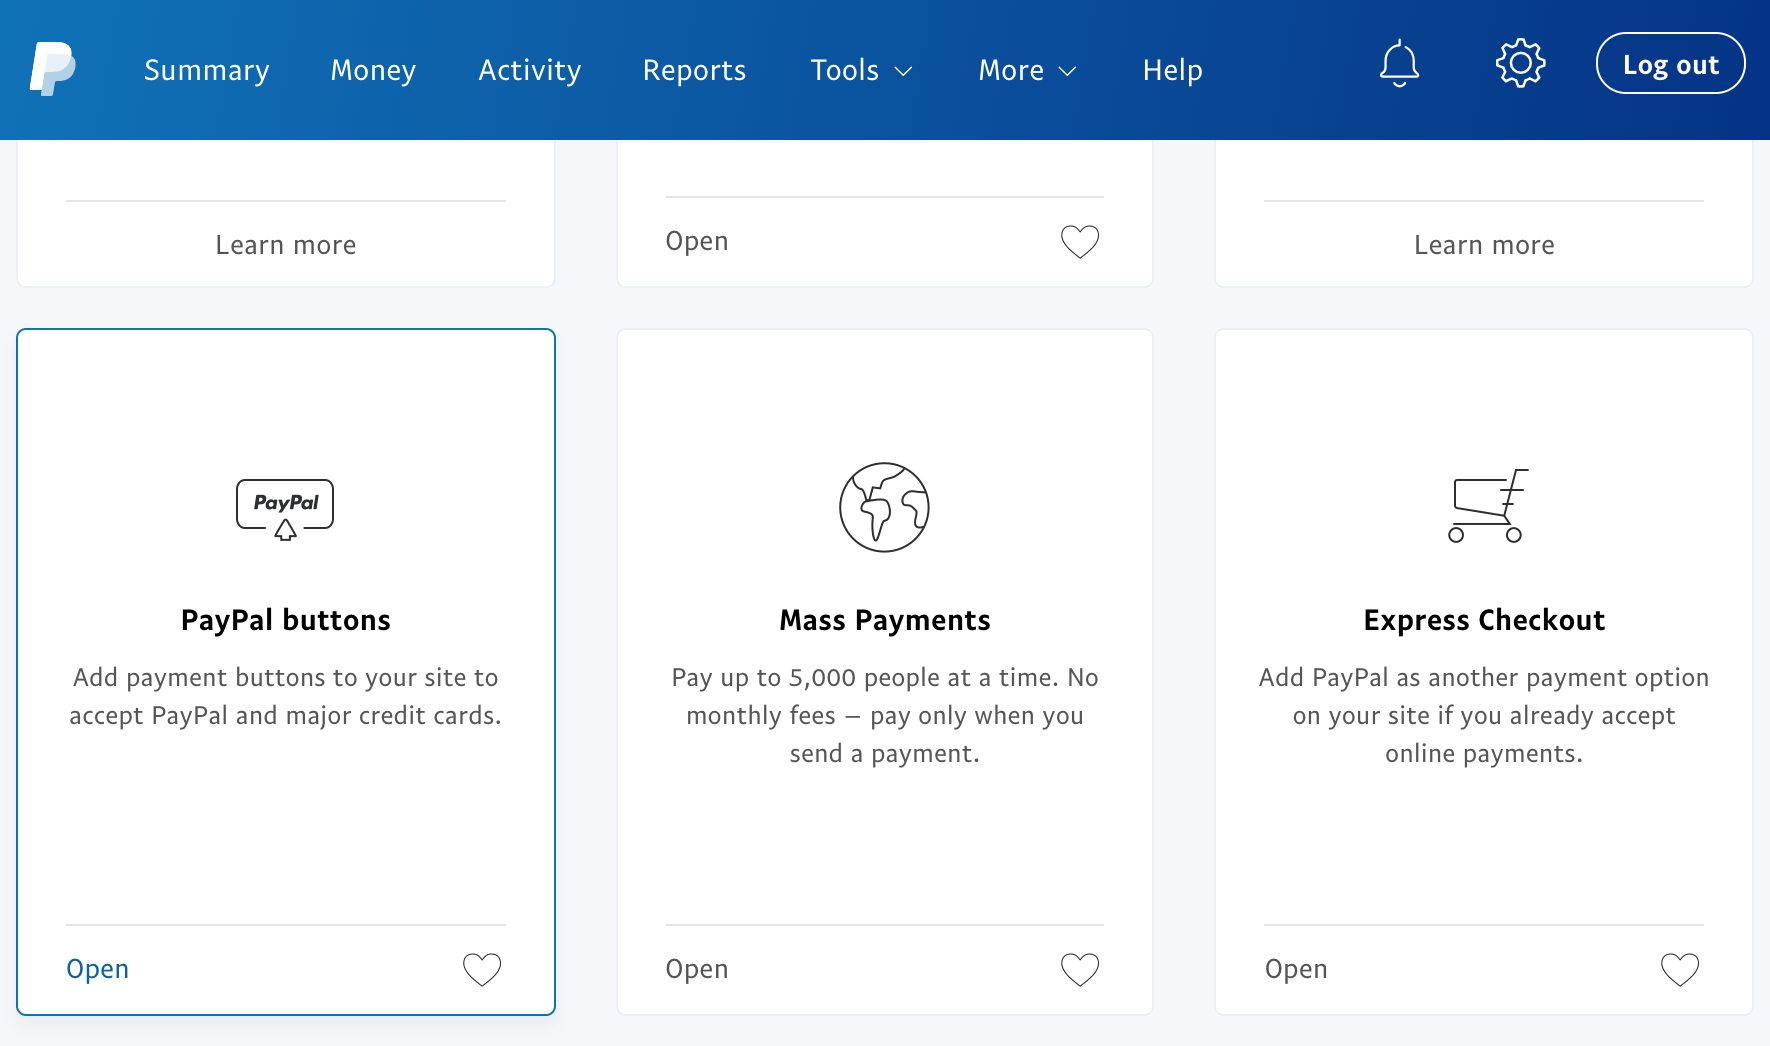
- Create your first Subscribe button
- Create the Unsubscribe button
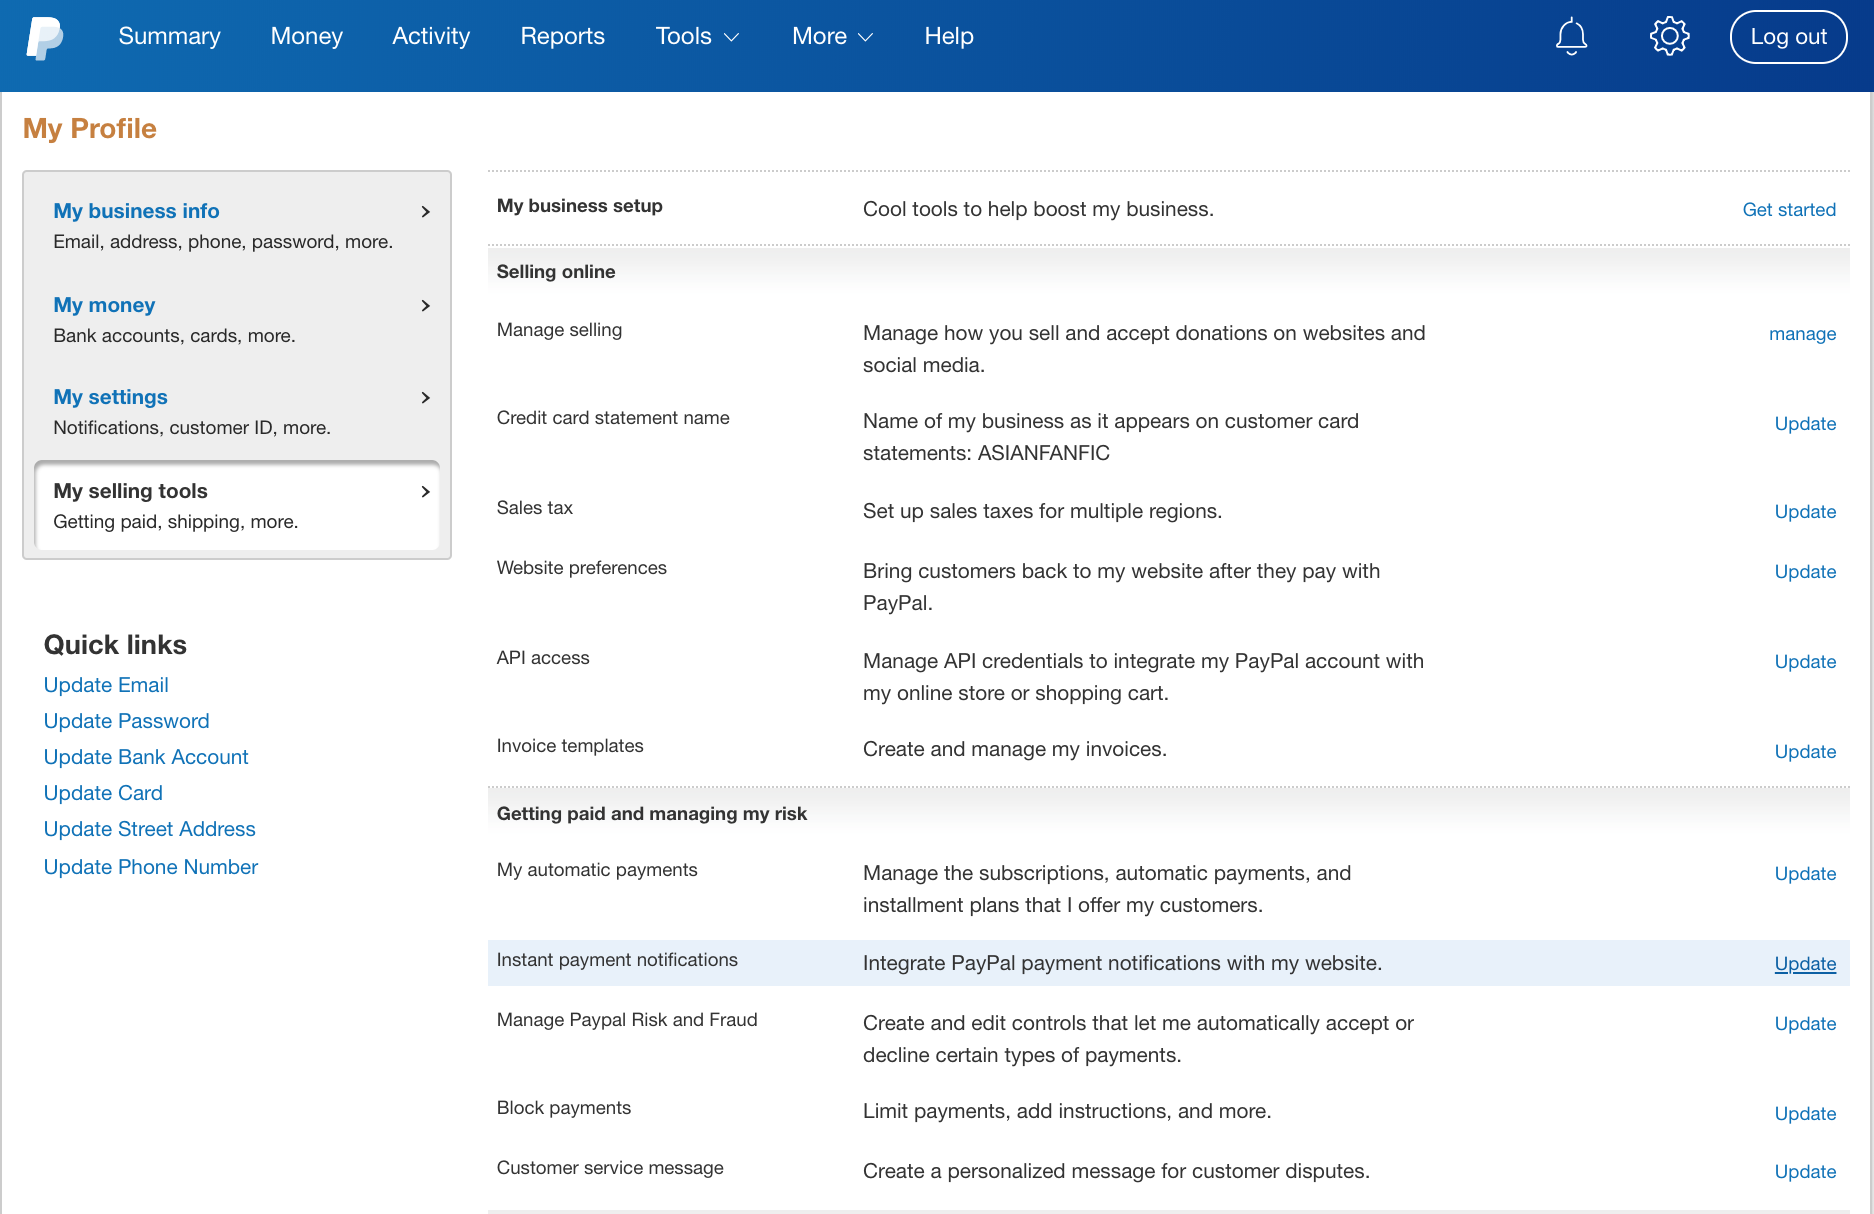
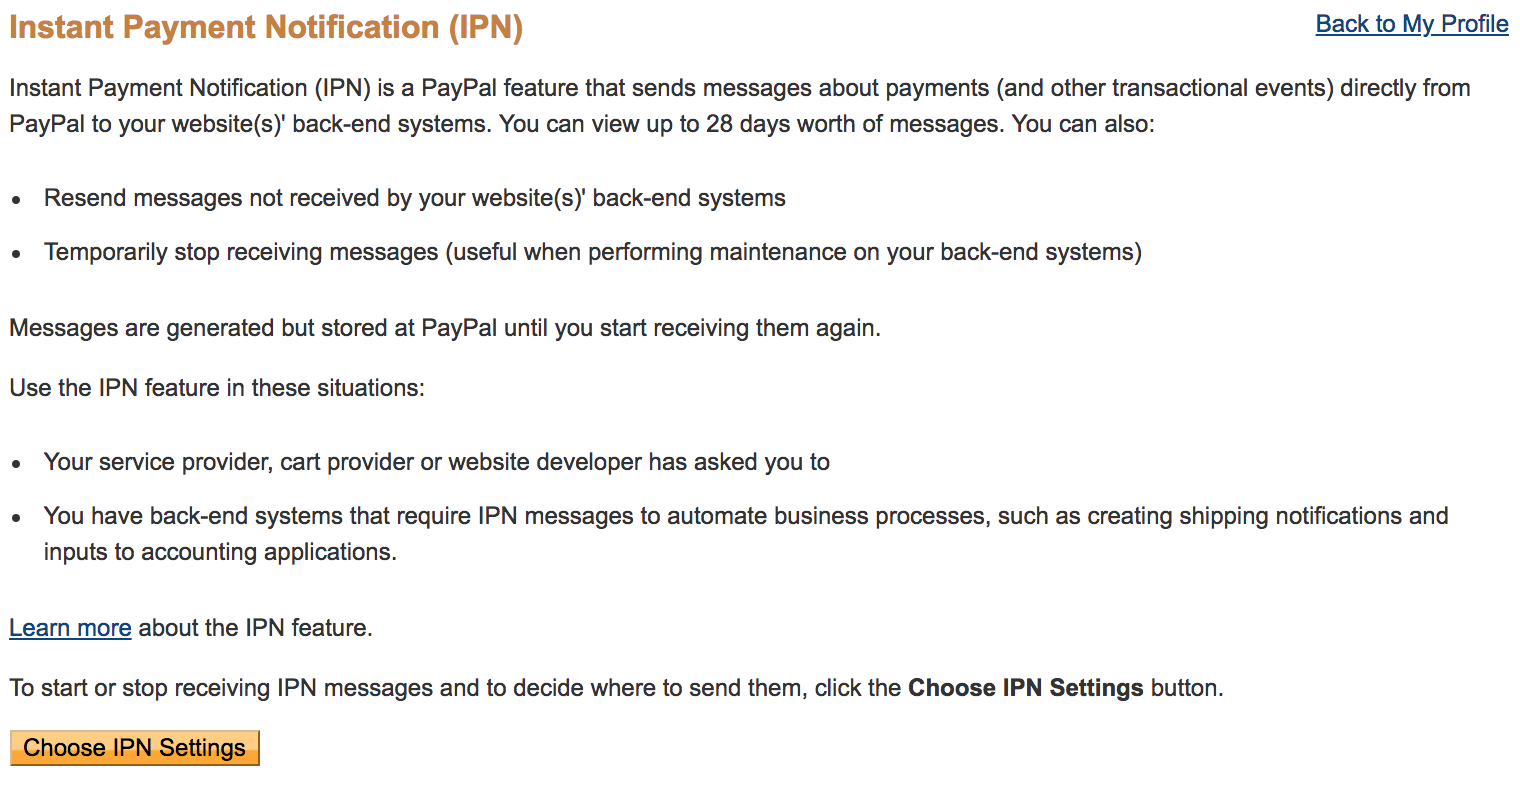
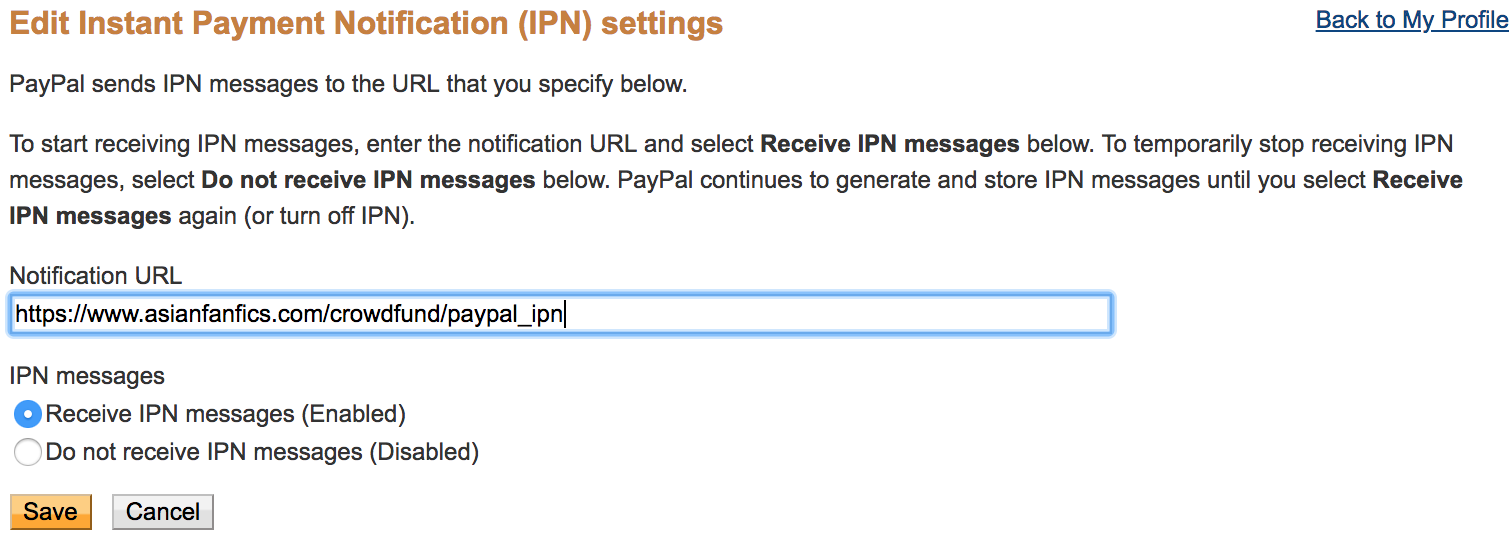
- Activate Instant Payment Notifications (IPN) (Be sure to do this!)
- Securing your PayPal account
Setting up a PayPal Business account
You will have to create a PayPal Business account since a personal account will not have subscription buttons available. Click on "Get Started" and follow the instructions provided.
Legal Business Name
When setting up a PayPal business account, most people get stuck on the "Legal business name" field especially when they don't have an officially incorportated business. In the United States at least, you do not have to officially incorporate when you start a business and you would legally be considered a "sole proprietor" (otherwise, every kid with a lemonade stand would have to be incorporated). For the "Legal business name" field, many authors and content creators generally use the name they want to be known by. While some aspiring authors use their own name as their legal business name to garner name recognition, others use a pseudonym or a pen name for privacy reasons. Of course, if you actually have a legally incorporated business, use its official name or DBA (Doing Business As).
"What kinds of products or services do you sell?"
For many people, this is the next step in the PayPal business account setup that often gives them pause. If you are an author or someone who makes digital content like posters and videos, the Digital Goods Media-Books, Movies, Music is a good option.
Bank Account
If you do not have a bank account or would like to use a different bank from your own for your PayPal Business account, try to find one that has no minimum checking amounts, no minimum deposit, and no fees. A popular bank in the United States with these features is Ally Bank (https://www.ally.com) which also happens to have one of the highest savings account yields in the nation as of this writing (2018). There are certainly other banks with these characteristics or you may have other needs so do your research especially if you're in a different country.
Should I Open A Separate PayPal Business Account or Convert My Personal One?
Many PayPal users simply choose to convert their personal PayPal account into a business account and use the same account for both personal and business needs. On the other hand, others create a PayPal business account separate from their personal one not only for easier accounting but also so that one account does not contaminate the other in case you run into trouble with one of them. Opening a separate account isn't hard but the only catch is that if you already have a bank account verified with your personal account, you will need a separate bank for your PayPal business account since PayPal does not allow you to link the same bank to multiple PayPal accounts. Luckily, there are many banks that don't charge fees or have minimum deposits so this shouldn't be a high hurdle either. To be part of our crowdfunding program, you can do either process as long as you have a PayPal business account since it is the only type of account that can create subscription buttons.
- https://www.paypal-community.com/t5/About-Business/Can-you-own-a-business-account-without-a-registered-business/td-p/1201007
- https://www.paypal-community.com/t5/About-Business-Archive/Premier-Account-quot-Business-Name-quot/td-p/957356
- https://www.quora.com/What-is-a-Full-Legal-Business-Name-for-PayPal/answer/Joel-Yarbrough-1?ch=10&share=4d362e12&srid=p3yj
Follow the tutorial below after you've finished setting up your PayPal Business account.
Transaction fees and how to reduce them
As already mentioned, we don't charge fees unlike other platforms. However, PayPal has their own fees. Every crowdfunding platform cannot escape transaction fees, even us. How it usually works with most crowdfunding platforms is this:
- Supporter makes a payment that goes to the platform. A payment processor like PayPal charges a transaction fee for that transfer.
- Crowdfunding platform takes their cut, usually 5%.
- Crowdfunding platform then transfers payments to the content creator at the end of the month. A payment processor like PayPal charges another transaction fee for that transfer.
- Supporter makes a payment directly to the content creator. A payment processor like PayPal charges a transaction fee for that transfer.
- https://www.paypal.com/gf/smarthelp/article/how-can-i-update-my-payment-preferences-for-micropayments-faq1691 (Some people report that you can only view this page while logged out of PayPal. Your best bet is to contact their customer service and ask to be converted to using micropayments.)
Create the Subscribe Button
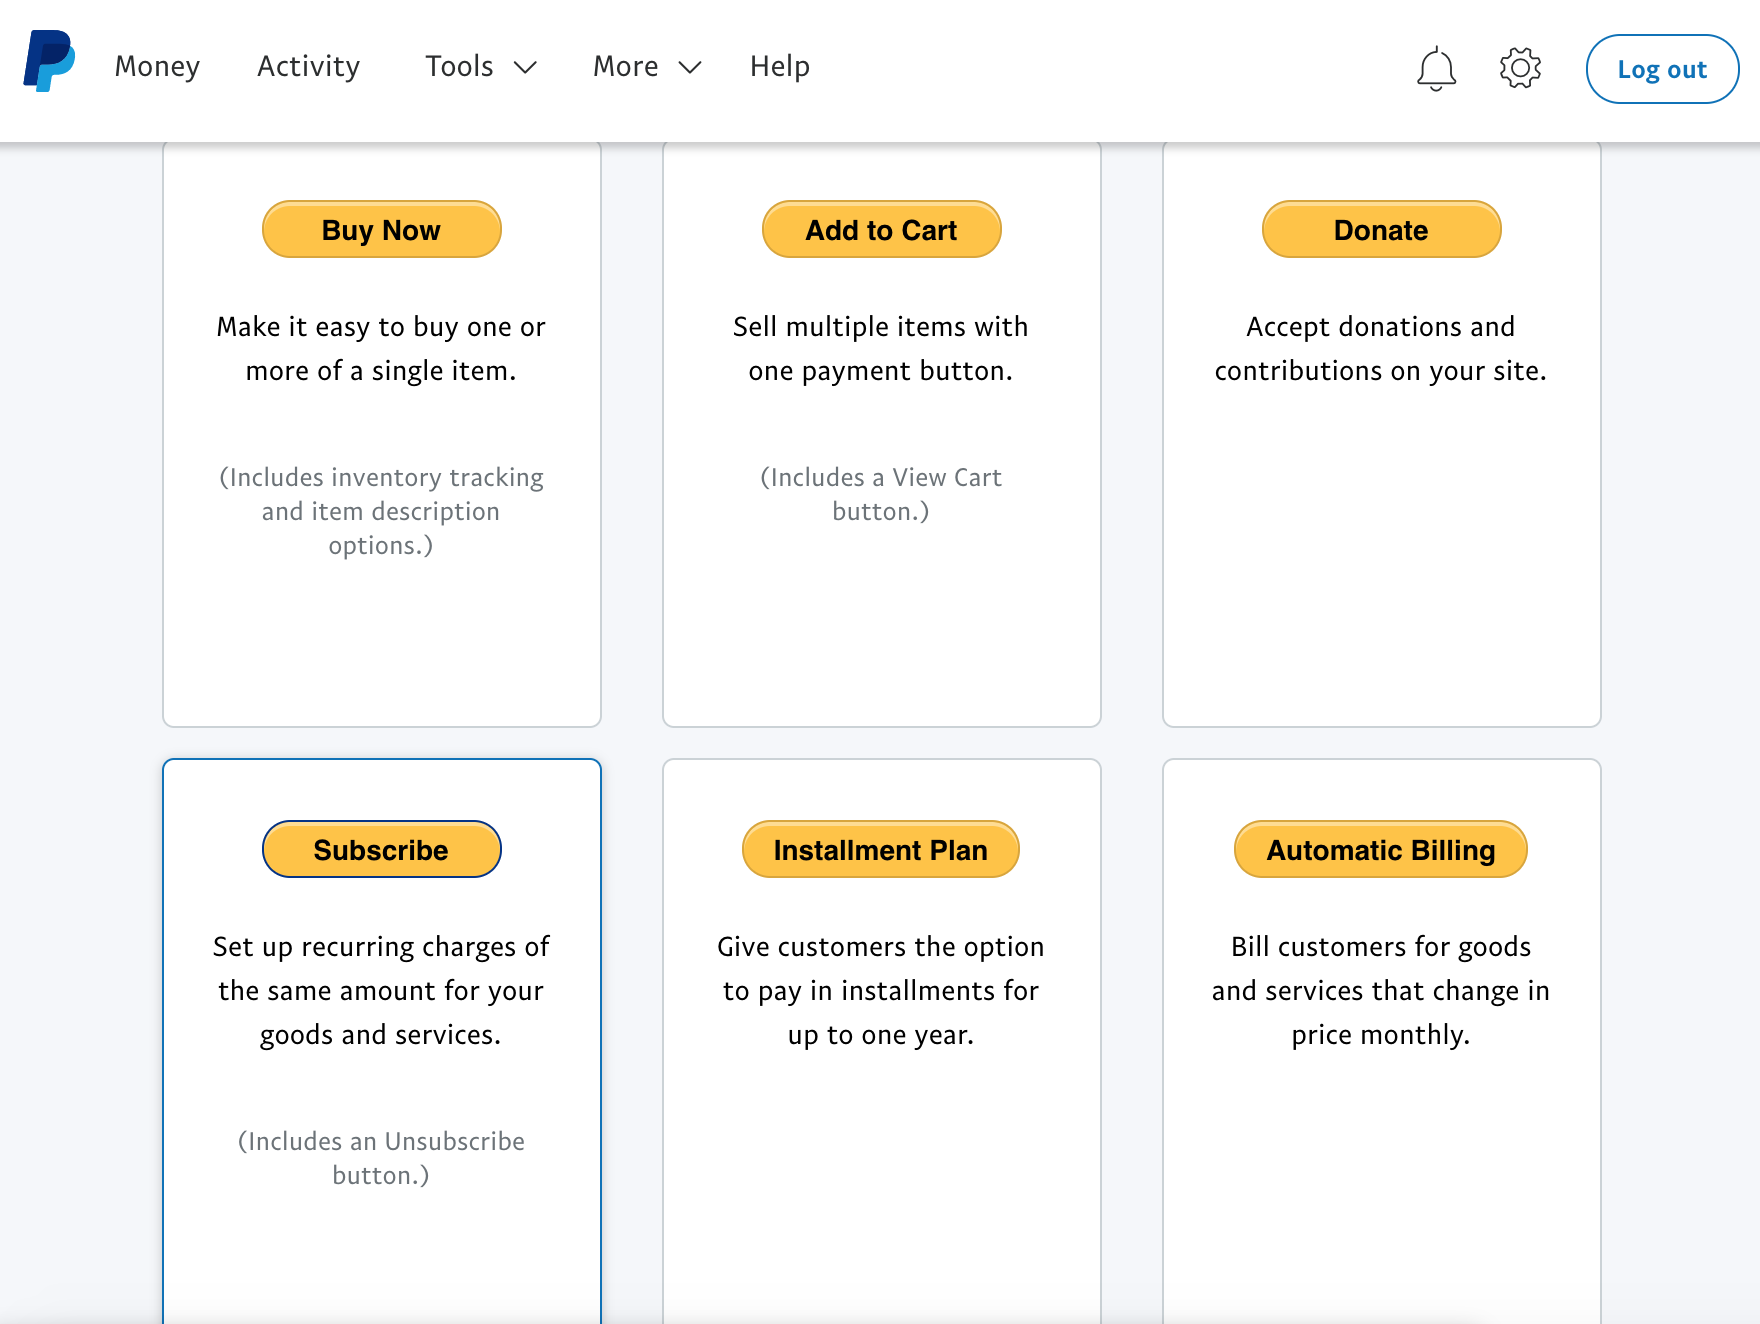
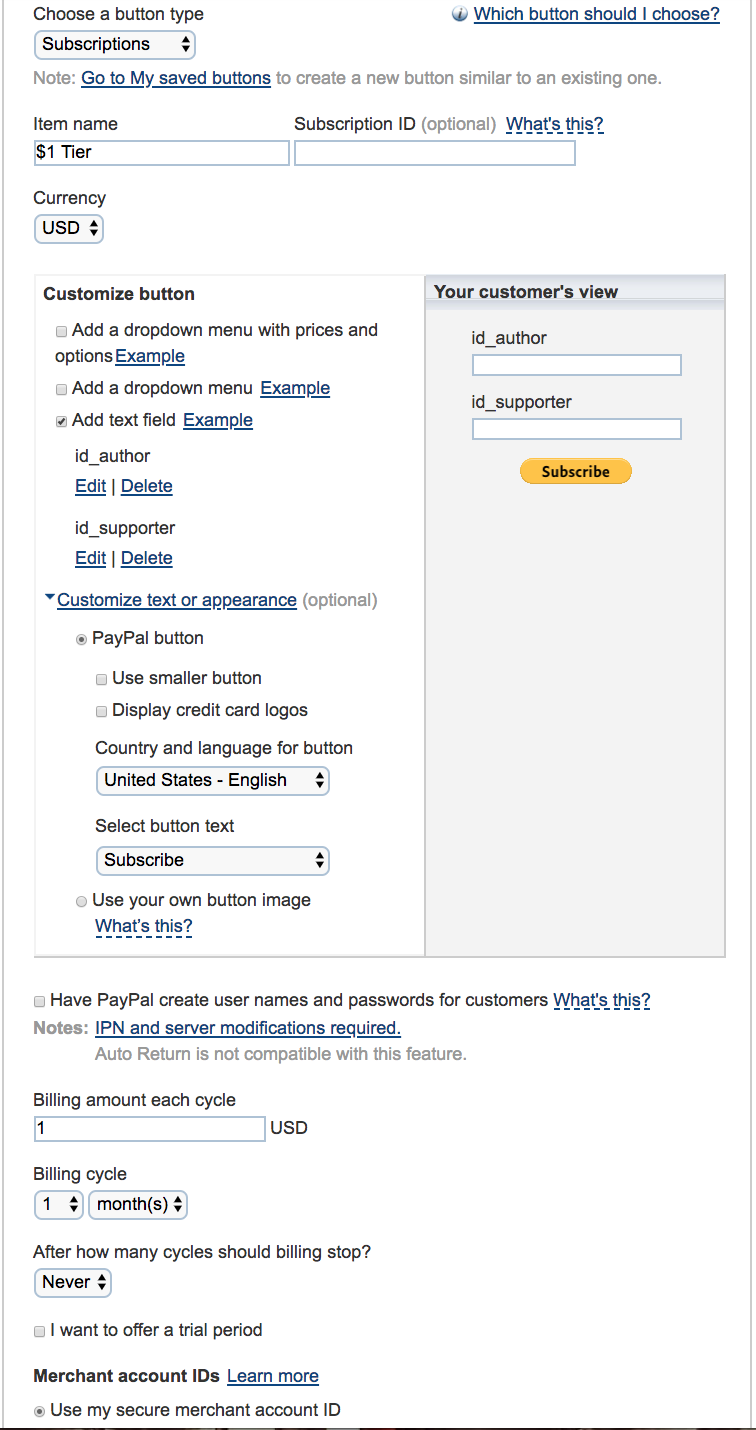
- Under "Item name", choose a descriptive name for your tier like "$1 Tier".
- Leave the Subscription ID blank and the currency to USD.
- Click on the "Add text field" checkbox and add two fields named id_author and id_supporter exactly in that order.
- Click on "Customize text or appearance" and un-check "Display credit card logos".
- Set the billing amount to exactly the tier you plan on pairing this button with so for example, a "$1 Tier" would have a "Billing amount each cycle" of 1 USD.
- Leave the "Billing cycle" to 1 month(s).
- Keep the "Merchant account IDs" selection to "Use my secure merchant account ID".
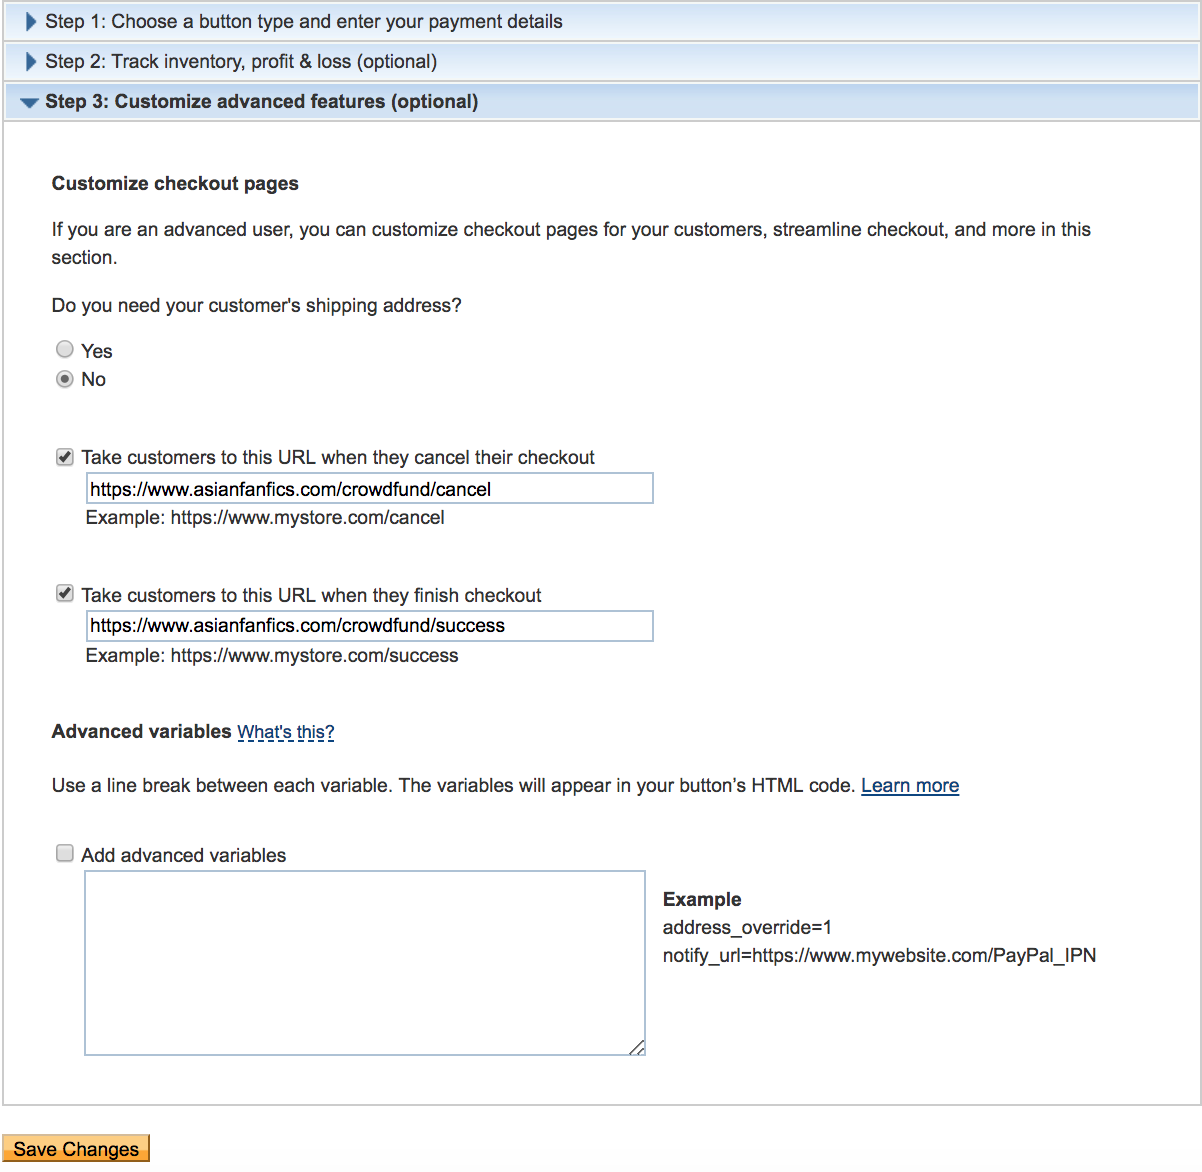
- Choose "No" for "Do you need your customer's shipping address?" Only choose "Yes" if you plan on shipping anything to your members and you explicitly state so in your tier description.
- Under "Take customers to this URL when they cancel their checkout", enter "https://www.asianfanfics.com/crowdfund/cancel" (this is our crowdfund order cancellation page).
- Under "Take customers to this URL when they finish checkout", enter "https://www.asianfanfics.com/crowdfund/success" (this is our crowdfund order success page).
- Save changes.
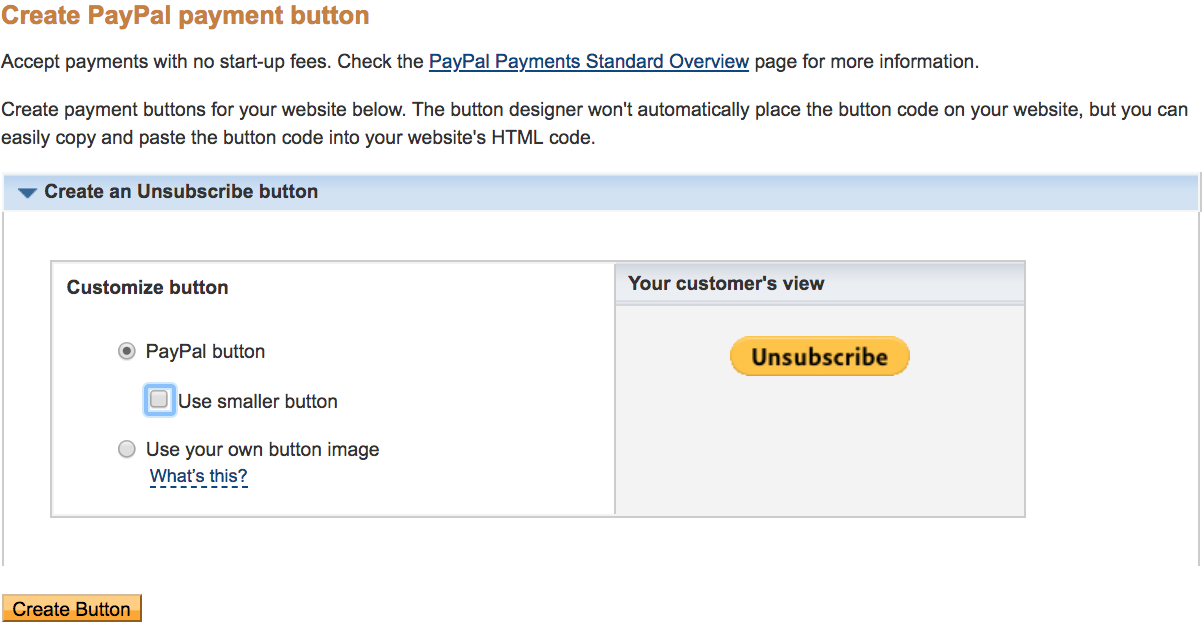
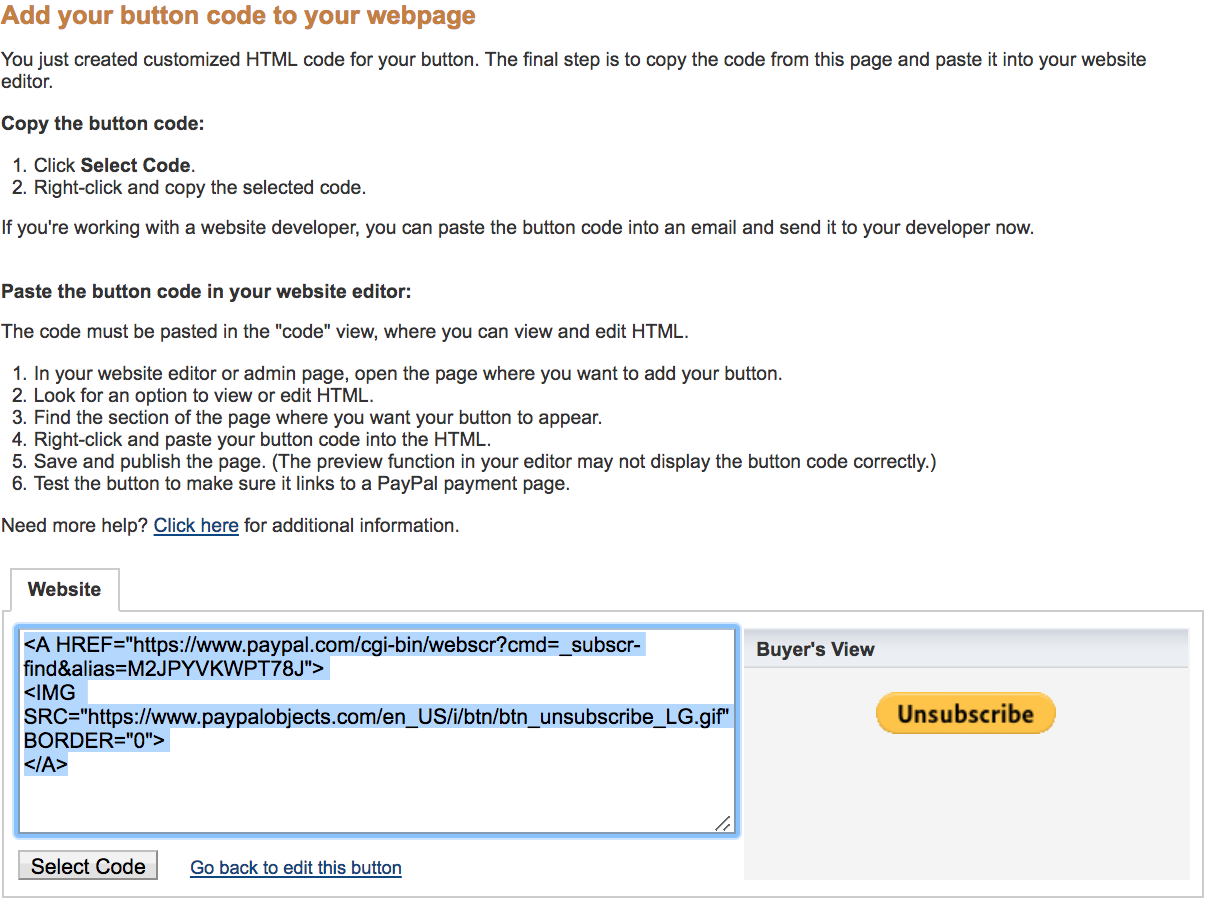
Create the Unsubscribe Button
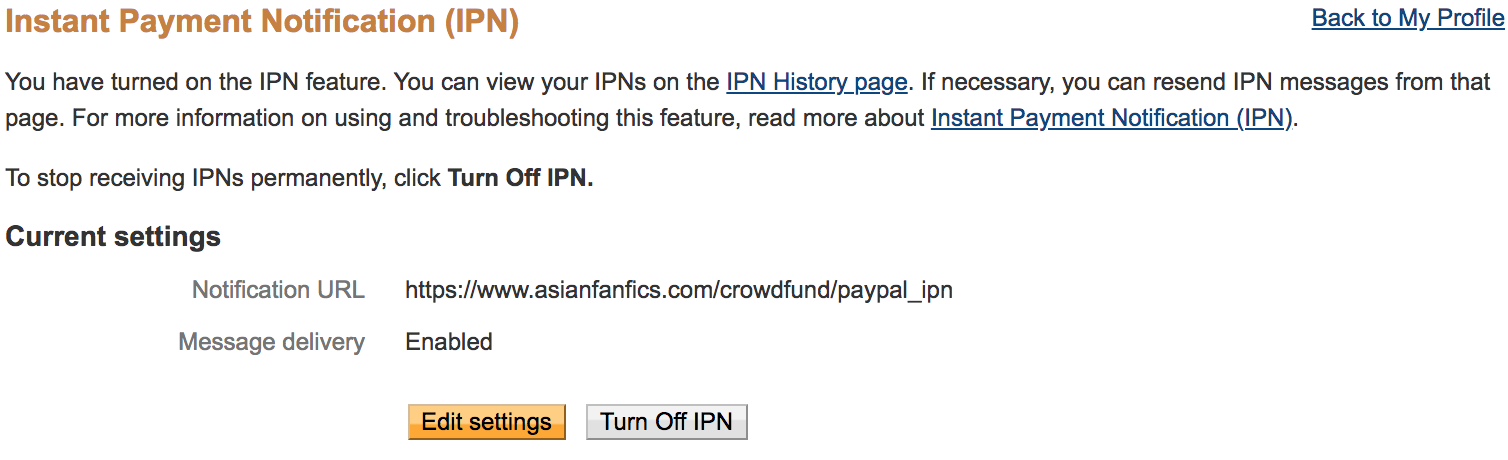
Activate Instant Payment Notifications (IPN)
Securing your PayPal account